
Residential
Smart Thermostat Installation: When to Hire a Smart Thermostat Installation Electrician
Pro Tech Power Corp
· 16 Min Read
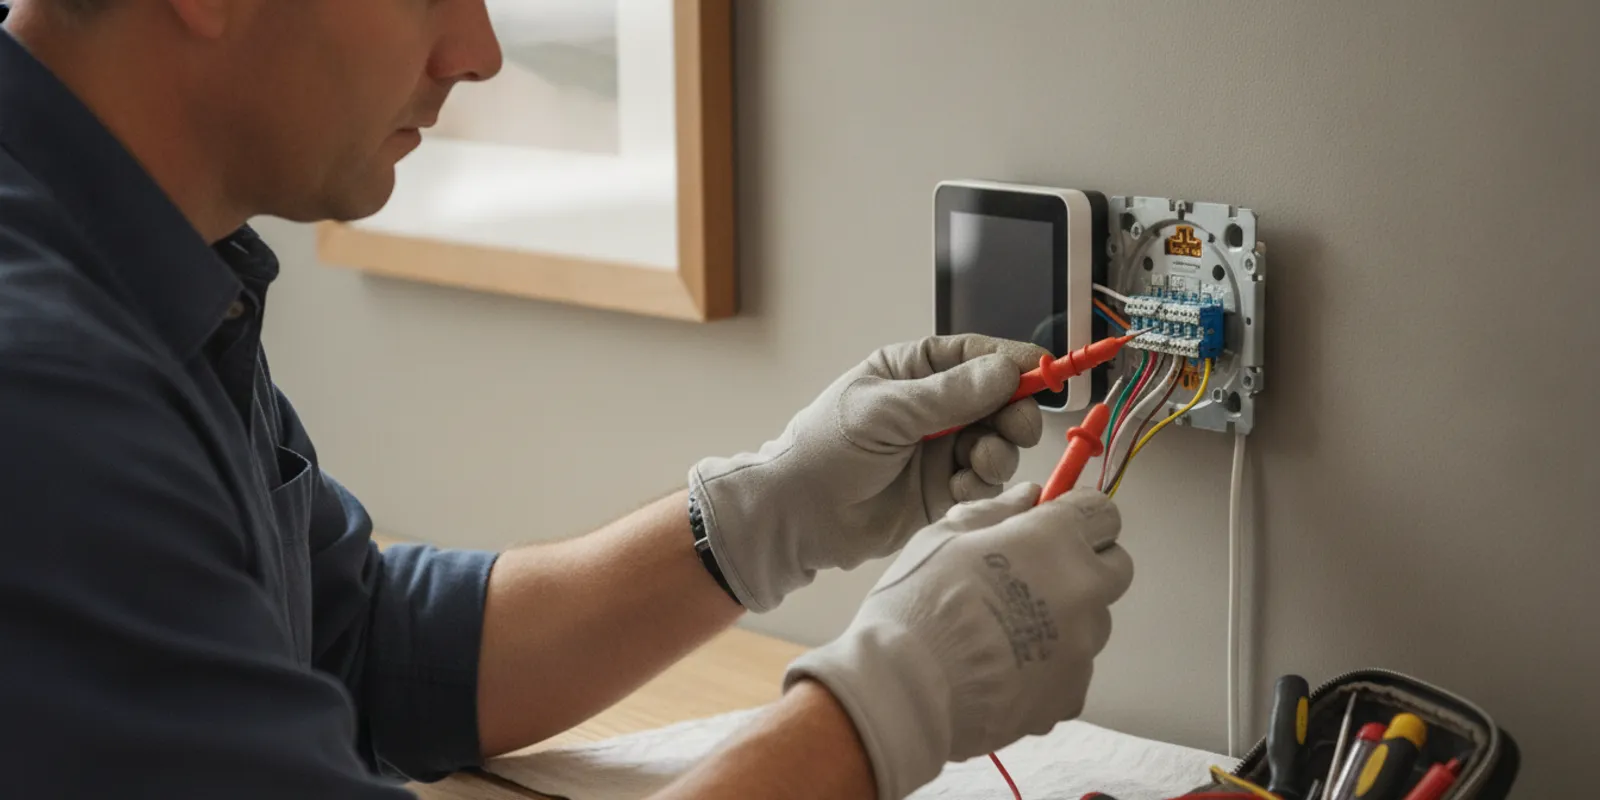
A smart thermostat installation electrician can help you sort through wiring, HVAC compatibility, power, and safety before a new control is connected. Some like-for-like replacements may be manageable for a confident homeowner, but a matching wire label does not prove that the new device is compatible or that the wiring is safe. Gather information first, then decide whether the project needs professional evaluation.
What should you check before choosing a smart thermostat?
Answer capsule: Check the existing thermostat terminals, heating and cooling equipment type, available power conductors, and the new thermostat maker’s compatibility requirements. Do not remove wiring or open HVAC equipment just to identify it.
Smart thermostats differ in the systems they support. A model may work with conventional heating and cooling but not with a particular heat pump, multi-stage setup, boiler, or proprietary control. Some need a common wire, often labeled C, to provide continuous power. Others use batteries, a manufacturer-approved adapter, or a different supported arrangement. Compatibility depends on the equipment and wiring together, not simply on the number of wires visible at the wall.
Before shopping, record the existing thermostat make and model, the heating and cooling equipment type if known, and the labels visible at the thermostat terminals. If the manufacturer permits removing only the thermostat faceplate for viewing, take a clear photograph before touching anything. Keep the photo for reference. Do not assume that wire colors indicate function; colors are not a dependable substitute for terminal labels or equipment documentation.
Check the thermostat maker’s compatibility checker and installation guide for the exact model you are considering. Compare its supported system types and stages with the equipment documentation. If the system type is unknown or the instructions do not clearly match, pause and ask a qualified professional who can assess the setup. Pro Tech Power handles electrical projects for residential and commercial customers. Its residential electrical work information is one place to review the company’s electrical offerings.
How can you assess the existing thermostat wiring?
Answer capsule: If the manufacturer allows a homeowner to remove the thermostat faceplate, look for terminal labels and a C-wire, and take a clear photo. Leave conductors connected. Stop if wires are damaged, unfamiliar, or part of a more complex control system.
Many thermostats use low-voltage control wiring, but low voltage does not mean every wire can be handled without care. Some homes have line-voltage thermostats or unusual equipment controls. A smart thermostat designed for low-voltage systems must not be connected to line-voltage wiring. If you see thick conductors, high-voltage warnings, or a setup that does not resemble the installation guide, do not proceed with a swap.
Common terminal labels can include R or Rc for power, C for common, W for heat, Y for cooling, G for the fan, and O/B for some heat-pump functions. Not every system uses these labels, and configurations vary. Jumper wires, multiple R terminals, extra heating or cooling stages, and accessories such as humidifiers can make a replacement less direct. Record what is present rather than moving a conductor based on its color or an online diagram.
A thermostat can have a C terminal with no conductor connected to it. In other installations, a spare conductor is tucked behind the wall plate. A missing C-wire may require a compatible adapter or new wiring; it is not a reason to improvise with another terminal. Consumer Reports’ smart thermostat installation guide discusses checking the existing setup and notes that some models may use a C-wire or an optional alternative. Follow the instructions for the specific thermostat and equipment rather than treating general advice as a wiring diagram.
Look at the visible setup only; do not pull conductors out of the wall to see how much wire is available. Do not open the furnace, air handler, boiler, or heat pump control compartment for this preliminary check. Those areas may contain electrical connections and equipment-specific controls that are outside a basic wall-plate inspection. If you cannot get the information without disturbing wiring, make a note of what you can see and leave the rest for a professional assessment.
If you are uncertain whether the thermostat circuit is powered down, if the wires appear brittle or damaged, or if you find more conductors than the guide explains, stop. An electrician can identify the electrical arrangement and assess the wiring before installation proceeds. A photo and the model numbers are more useful than an attempted repair that changes the original connections.
How do you know whether the thermostat is compatible with your HVAC system?
Answer capsule: Match the thermostat’s supported system types and stages to the equipment’s actual configuration. Confirm heat-pump, auxiliary heat, multi-stage, boiler, and accessory requirements instead of relying on a broad claim that a device works with most systems.
Start with the model number on the furnace, air handler, heat pump, or boiler documentation. If the manual is not available, a photo of the equipment label may help a qualified professional identify the system. Then compare the details with the thermostat manufacturer’s compatibility list. A model name alone may not reveal the stages or control arrangement, so check the full equipment information when possible.
- Conventional heating and cooling: Verify the number of heating and cooling stages. A thermostat with fewer supported stages may not control the system as intended. Check whether the equipment uses a single-stage or multi-stage configuration and make sure the new control lists the appropriate setup.
- Heat pumps: Confirm that the thermostat supports the heat pump and its reversing-valve configuration. Check whether auxiliary or emergency heat is present and how the thermostat expects it to be connected. A setting that is wrong for the equipment can lead to unexpected heating or cooling behavior.
- Boilers and radiant heat: Confirm that the thermostat supports the control method and voltage used by the equipment. A device intended for a different system may not be suitable, even if its terminal labels seem familiar.
- Added controls: Humidifiers, dehumidifiers, ventilation equipment, and zoning controls can affect compatibility. Note these components before selecting a thermostat because they may use extra terminals or a separate control arrangement.
When a home has more than one HVAC system or thermostat, assess each zone separately. A model that fits one part of the home may not fit another. For example, a conventional furnace-and-air-conditioning setup upstairs and a heat pump downstairs can require different compatibility checks. Keep each thermostat’s photo, equipment model, and product notes together so details do not get mixed up.
Also check which functions you expect to use. A smart thermostat may offer remote adjustments, schedules, occupancy features, or equipment alerts, but those functions do not establish HVAC compatibility. First confirm that the model can control the equipment correctly. Then review the manufacturer’s requirements for home network access, app setup, account creation, and any optional sensors. Those are separate decisions from electrical readiness.
If the manufacturer’s compatibility checker gives an uncertain result, save the result and the equipment model number rather than selecting the closest-looking option. Ask a qualified electrician or HVAC professional to identify the system details that remain unclear. For a broader view of completed electrical projects, you can browse the project portfolio, but the product maker’s compatibility guidance should remain the source for a specific thermostat model.
What power requirements should you plan for?
Answer capsule: Confirm how the thermostat will receive the power it requires. If the manufacturer calls for a C-wire and none is connected, use only an approved solution and have any wiring changes assessed by a qualified electrician.
Many connected thermostats need a steady power source for their display, network connection, sensors, and scheduling functions. Older thermostats may have operated without a C-wire because they used batteries or drew power differently. That does not mean an unused conductor can safely be repurposed without confirming its purpose at both ends.
Possible arrangements vary by product and system. A thermostat may accept batteries, a manufacturer-approved power adapter, or a C-wire connected to the HVAC control board. Some homes have an available spare conductor; others may need a new cable or another compatible solution. The right choice depends on the product instructions, existing wiring route, and equipment terminals. A spare wire visible at the wall is not enough to prove it is connected or available for use at the other end.
Do not bridge terminals, borrow power from a neighboring circuit, or connect a conductor based on a guess. An incorrect connection can damage controls or stop heating and cooling. Do not use a wiring diagram for a different thermostat or equipment model as a substitute for the instructions that match your installation. A diagram can look similar while assigning a terminal a different role.
If wiring must be added, the route may involve finished walls, limited access, or coordination at the HVAC equipment. Before work begins, ask what power method the thermostat requires, whether the existing cable can support it, and whether a new conductor or approved adapter is being considered. Ask how the proposed approach will be checked against both the thermostat instructions and the equipment documentation.
Battery operation, where supported, does not automatically mean every other power question disappears. The exact thermostat may still require particular conductors for heating or cooling control. Likewise, an adapter is not a universal fix: it must be made for the thermostat and system configuration. Follow the product maker’s instructions and do not treat an accessory’s physical fit as proof of electrical compatibility.
When should an electrician handle the installation?
Answer capsule: Bring in an electrician when wiring is unfamiliar, the system uses line voltage or complex controls, a C-wire solution is needed, conductors are damaged, or installation instructions do not clearly fit. Professional help is also sensible when you want the wiring and power arrangement assessed before purchase.
A simple, like-for-like replacement may be within a capable homeowner’s comfort level when the manufacturer explicitly supports the HVAC system and wiring, and the work requires no wiring changes. Even then, follow the exact directions, shut down equipment as instructed, and stop if anything differs from the guide. Do not continue simply because the old thermostat came off easily; the old and new models may have different power or control requirements.
Consider professional evaluation if any of the following apply:
- You cannot identify the system type, terminal labels, or function of a conductor.
- The current thermostat uses line-voltage wiring or has a warning label you do not understand.
- The new thermostat needs a C-wire, adapter, new cable, or changes at equipment controls.
- The system is a heat pump, multi-stage setup, boiler, or zoned installation and compatibility is uncertain.
- There are signs of heat damage, loose connections, frayed insulation, or prior improvised wiring.
- The thermostat controls accessories or equipment not covered clearly by the installation guide.
- The HVAC equipment does not restart normally after a permitted, manufacturer-directed check.
- You cannot identify how to shut down the correct equipment safely before work.
An electrician can assess electrical wiring and power needs, while HVAC equipment configuration may call for coordination with an HVAC professional. Ask who will verify each part of the setup before work begins. In particular, clarify who will confirm the thermostat terminals, power arrangement, HVAC operating mode, and basic response of the equipment after connection. The company background and its portfolio of completed work can offer additional context when you are deciding whom to contact.
Good professional involvement is not limited to the moment wires are connected. The value can also be in identifying the system correctly, explaining which thermostat models are supported, and defining whether any wiring change is needed. If a question crosses from electrical wiring into equipment configuration, ask how the two areas will be coordinated before the installation date. This avoids discovering a mismatch only after the existing control has been removed.
What is the difference between a homeowner check and electrical work?
Before committing to installation, homeowners can collect product and system information without changing connections. Electrical work begins when someone modifies wiring, adds a conductor, works at the HVAC control board, or connects a thermostat to a circuit whose type is uncertain. The distinction is useful because planning information can often be gathered safely while wiring changes require the right knowledge and precautions.
| Planning item | Homeowner can gather | When to involve an electrician |
|---|---|---|
| Thermostat details | Record the current model and the new thermostat’s model and instructions. | Compatibility remains unclear after checking the manufacturer’s guide. |
| Visible wiring | Take a photo of visible terminal labels and connected conductors if the instructions allow. | Wires are damaged, unidentified, line-voltage, or need to be changed. |
| System type | Find the equipment model and note whether the home has a heat pump, boiler, or multiple zones. | Controls or system stages do not match the new thermostat’s supported setup. |
| Power plan | Check whether the thermostat requires a C-wire, batteries, or an approved adapter. | A new wire or connection at the equipment is needed, or the power source is uncertain. |
| After connection | Use the manufacturer’s basic setup and operating checks when appropriate. | The system does not respond as expected or wiring needs troubleshooting. |
| Additional controls | List known zones and accessories, such as ventilation or humidity controls. | Extra terminals or equipment are not addressed in the product guide. |
This distinction helps keep planning safe and efficient: gather facts first, but do not treat a photograph or wire color as permission to change a connection. A professional can resolve the questions that require testing, identification, or wiring work. If there is a mismatch between visible wiring and the instructions, pause and share that discrepancy rather than trying a different terminal until the device powers on.
How should you prepare for an electrician’s assessment?
A few details can make the conversation more useful. Have the thermostat model number, the new product’s compatibility notes, and the HVAC equipment model available. If you have a clear photo of the existing terminal labels, share it, but do not disconnect wires to improve the picture. Include the thermostat faceplate and labels in the photo if possible, while keeping the conductors in their original positions.
Describe how many thermostats or zones the home has and whether it uses a heat pump, boiler, or supplemental heat. Mention accessories connected to the existing thermostat and whether the current system has had intermittent control problems. State whether you are asking for an installation assessment or help determining which thermostat model suits the system. If you have already purchased the device, provide its full model number before scheduling so compatibility can be discussed with the actual product instructions in view.
It can help to separate what you know from what you are unsure about. For example: “The existing wall control has R, W, Y, and G terminals, but I do not know whether a spare conductor is connected at the equipment.” That statement is more useful than guessing that the system is conventional or that a hidden wire must be common. A clear question lets the electrician focus on the uncertainty that needs evaluation.
Useful questions include:
- Does this thermostat support my exact system type and stages?
- How will the thermostat receive continuous power?
- Would wiring need to be changed at the wall, the equipment, or both?
- Does my setup require coordination with an HVAC professional?
- What system behavior will be checked once the work is complete?
- Should I select or purchase a thermostat only after the wiring and system are identified?
- What should I avoid touching while waiting for the assessment?
For a local assessment, you can review areas served and use the contact page to describe your project. Pro Tech Power works with residential and commercial customers across its regional footprint. You can also share the thermostat and equipment details when requesting an estimate. Include whether the job appears to be a like-for-like replacement or may require a power or wiring change.
What should you confirm before and after installation?
Before installation, confirm that the thermostat model, HVAC type, wiring arrangement, and power method all line up. Keep the product instructions accessible and make sure questions about unfamiliar labels are answered before a conductor is moved. If a compatible thermostat has not yet been selected, write down any limits identified during the assessment and use them when comparing models. This is more reliable than choosing a device first and hoping its wiring can be adapted afterward.
Agree on what the planned work includes. For a straightforward replacement, that may mean identifying the existing controls, connecting the compatible device as directed, configuring the thermostat, and checking basic heating and cooling responses. If an adapter or new conductor is involved, ask where it will be installed and how its suitability will be confirmed. Do not assume that every proposal includes app setup, network troubleshooting, or changes to the HVAC equipment; clarify the boundaries beforehand.
After the work, use the manufacturer’s instructions to review the displayed settings and basic operation. Confirm that the thermostat recognizes the expected system type and that requested heating, cooling, or fan operation produces the response described by the equipment maker. If a setting or response does not make sense, stop changing configuration options and contact the installer or appropriate professional. Repeated trial-and-error changes can obscure the original issue.
Keep the thermostat model, installation notes, and any adapter or wiring documentation with the home records. That information can help with future troubleshooting, replacement, or changes to the HVAC system. If another thermostat is installed in a different zone later, do not assume it uses the same wiring or settings; document that system separately.
Frequently Asked Questions
Can I install a smart thermostat without a C-wire?
Sometimes. It depends on the thermostat model and HVAC system. Some products accept batteries or a manufacturer-approved adapter; others require a C-wire. Check the exact instructions, and ask an electrician if wiring needs to be added or identified.
Can wire color tell me which thermostat terminal to use?
No. Colors can vary between installations and do not reliably establish a wire’s function. Use the terminal labels and equipment documentation, and do not move a conductor when its purpose is uncertain.
Does a smart thermostat work with every heat pump?
No. Confirm that the specific thermostat supports the heat-pump configuration, reversing-valve setup, and any auxiliary heat. The product’s compatibility guidance and the equipment model are both important.
Should the HVAC equipment be turned off before installation?
Follow the specific thermostat and HVAC manufacturer’s directions for shutting down equipment. If you cannot identify the correct way to make the setup safe, or if the directions do not fit what you see, stop and get qualified help instead of guessing.
Should I buy the thermostat before asking an electrician?
If you already know the system type and the manufacturer confirms compatibility, you may have enough information to choose a model. If wiring, power, or equipment details remain uncertain, get those questions answered first. Having the model number of a device you are considering can still help an electrician assess whether it is a match.
Request an electrical estimate
Matching a smart thermostat to the existing system starts with careful documentation, clear compatibility checks, and a realistic plan for power and wiring. When the setup is unfamiliar or requires changes, a qualified electrician can help you take the next step with confidence.