
Lighting
In-Wall Speaker Installation: Wiring and Placement Considerations

Pro Tech Power Corp
· 16 Min Read
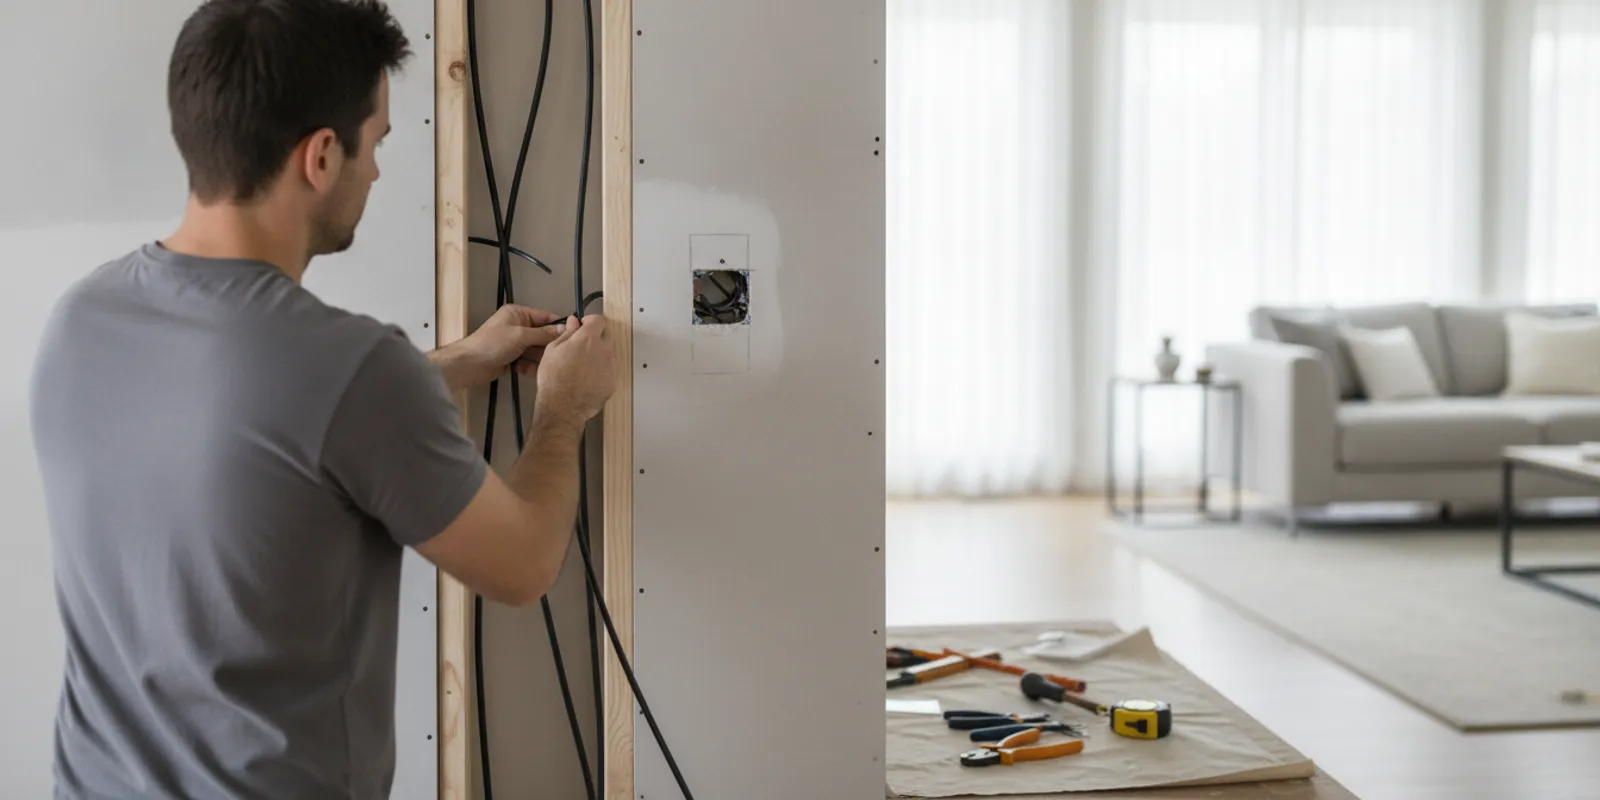
In wall speaker installation works best when room layout, listening position, wire routes, and wall conditions are planned together. A little preparation can prevent misplaced cutouts, visible cable, damaged finishes, and costly changes after drywall is closed.
Request an electrical estimate
What should you decide before cutting into a wall?
Answer capsule: Confirm the room use, number of listening areas, speaker locations, equipment location, and the construction state before anyone cuts an opening. These decisions shape the cable path and determine whether access from an attic, basement, or open framing is available.
Start with what you want to hear and where. A room used for casual background music has different placement priorities from a media room where listeners face one screen. Make a simple floor plan, mark the main listening area, doors, windows, built-in cabinets, furniture, and likely equipment shelf. The drawing does not need to be architectural. It needs to show the features that affect sound and access.
Next, identify whether this is new construction, a remodel with walls open, or a finished room. Open framing often makes it easier to route wire and inspect the cavity. In a finished room, a professional may need to check for existing wiring, blocking, insulation, plumbing, and other concealed conditions before choosing a route. Do not assume a clear cavity based on the room layout alone.
Write down the basic system plan. Include how many speakers you expect, whether they are in one room or several, where the amplifier or receiver will sit, and whether you may add equipment later. Think through how the system will be controlled and how cable will get from the equipment location to each speaker. If the equipment cabinet is across the room from the easiest wall access, that affects the route and the amount of finish work.
For a broader view of the electrical work available for homes, review Pro Tech Power's company background. A qualified electrician can help assess the wall conditions and coordinate concealed wiring with the rest of the project.
How should you plan speaker placement?
Answer capsule: Place speakers in relation to the listening area, room shape, seating, and obstructions—not simply wherever a wall cavity is easiest to reach. Confirm every location on the wall before making an opening.
There is no single spacing rule that fits every room. Room dimensions, speaker design, seating distance, ceiling height, furnishings, and whether sound is intended for one seat or a wider area all matter. Follow the speaker maker's placement guidance, then confirm the proposed positions with the people who use the room. When possible, mark the locations temporarily and listen from the main seating area before cutting.
For music across a room
In a room for general listening, plan for coverage that feels balanced across the areas where people sit or move. Avoid placing both speakers close together at one end if the goal is even sound throughout the room. Consider the walls, room openings, and the likely furniture arrangement. A sofa that may move or a large bookcase planned for one wall can change the useful locations.
For a screen-focused listening area
For a screen-focused layout, coordinate the speakers with the screen and the listener's primary position. Check that a proposed speaker will not be covered by tall furniture, a curtain, a door swing, or a planned wall feature. If the design includes several speaker positions, map them all before routing any cable; moving one after the others are installed can create an uneven layout.
Check the wall cavity and nearby features
Use a stud finder and other appropriate inspection methods as preliminary checks, not as proof that a location is safe to cut. Studs, fire blocks, insulation, pipes, electrical wiring, ductwork, and structural elements can restrict an opening or route. A speaker template can help establish the cutout size, but its position must fit inside the actual cavity and preserve required clearances. Do not cut a stud, joist, brace, or other structural element to make a speaker fit.
Make a full-size paper or cardboard template and hold it at each proposed position. Check the layout from normal standing and seated views. Look for symmetry where it serves the listening plan, but do not force symmetry if a doorway, fireplace, or other fixed feature makes it impractical. A carefully adapted placement is better than a visually even layout that points sound away from the listening area.
Mark the center and outline clearly, then photograph the marked wall with nearby reference points visible. That record helps the installer confirm the agreed locations and gives the project team a reference if trim or furniture will be added later. If this is part of a larger remodel, include the wall plan in the project conversation early. Examples of completed electrical work can be viewed in the project portfolio.
How do you route speaker wire inside the wall?
Answer capsule: Plan a continuous, concealed route from the equipment location to each speaker, while avoiding hazards and preserving required wall and fire-blocking details. The specific cable, route, and separation requirements depend on the system and the building conditions.
First locate the source and destination points. Consider a route that can be inspected and accessed during construction, rather than choosing the shortest line on a drawing. Cable may travel through a wall cavity and along an accessible attic or basement, but concealed obstacles and building layout determine what is practical. A finished wall may require carefully planned access openings and patching.
Keep low-voltage speaker wiring distinct from line-voltage conductors. Do not bundle or place the cables together simply because that is the easiest route. Electrical codes, product instructions, and the conditions at the site govern separation, crossing, protection, and installation methods. Where crossing is necessary, the installer should use a suitable approach for the situation and applicable rules, rather than improvising around energized wiring.
Use cable intended for the pathway and building location. Cable ratings and permitted uses matter, especially where a route passes through an air-handling space or other regulated area. The system designer or electrician should confirm that the selected cable is appropriate for the actual route. Do not treat a label or a general online guide as a substitute for checking product instructions and local requirements.
Plan slack and termination points deliberately. Too little cable can make speaker connection difficult; uncontrolled extra cable can snag, bunch up, or complicate the finish. Label both ends with a durable, understandable room and speaker designation before the ends disappear into the wall. For a multi-room installation, create a simple cable schedule that lists the source, destination, and intended channel for each run.
Also decide whether future access is important. A properly placed low-voltage bracket or back box may help provide a neat opening and stable mounting, depending on the speaker design and wall construction. Confirm compatibility before purchase. A speaker that clamps directly to drywall may require different preparation from one designed for a back box. The cutout, cable entry, and mounting system should work together.
What power and fire-blocking details need attention?
Answer capsule: In-wall speakers and their low-voltage wires do not remove the need to respect electrical wiring, fire blocks, rated assemblies, and applicable building rules. Have the route assessed before drilling, cutting, or altering a concealed barrier.
Many in-wall speaker connections carry low-voltage audio, but the equipment that drives them plugs into a power source. Plan where the amplifier or receiver will go, how its cord will reach a suitable receptacle, and whether the equipment shelf has enough ventilation and space. Do not run an ordinary power cord inside a wall as a substitute for a properly installed concealed power solution. If the equipment location needs a new receptacle or other line-voltage work, include that in the electrical plan.
Walls can contain fire blocking or form part of a rated assembly. A hole through a stud bay, top plate, bottom plate, or other barrier may require a compliant firestop or other approved detail. The correct method depends on the assembly, opening, materials, and applicable code. Do not fill openings with convenient household materials or assume that a small hole has no consequence. Ask the electrician or building professional responsible for the project how penetrations will be treated and documented.
The National Fire Protection Association provides public information on fire and life safety at its official website. For a particular building, use the applicable adopted code and guidance from the authority having jurisdiction; a general information page does not determine the requirements for a specific wall.
Before work begins, clarify who is responsible for checking concealed conditions, making any required opening, protecting existing wiring, and restoring any fire-resistance feature. If the room is part of a multi-unit building or a commercial property, confirm whether property management or a building official must review the proposed route. Requirements can differ by building type and by the wall's role.
| Planning condition | What to verify | Useful next step |
|---|---|---|
| Open framing | Speaker positions, cable rating, framing obstacles, and required blocking details | Coordinate wire routes before insulation and drywall |
| Finished interior wall | Stud locations, hidden wiring, pipes, insulation, and access for routing | Arrange an inspection plan before cutting |
| Wall in a rated or shared assembly | Assembly requirements and approved penetration treatment | Ask the responsible building professional or authority having jurisdiction |
| Equipment location needs power | Receptacle access, circuit conditions, and equipment ventilation | Include line-voltage needs in the electrical scope |
How can you protect finishes during installation?
Answer capsule: Protect the room, verify each cutout, and agree on who patches and paints before work starts. A clean installation depends as much on preparation and coordination as on the speaker itself.
Move furniture away from the work area or cover it securely. Protect flooring, nearby cabinetry, artwork, and electronics from dust. Turn off or protect affected equipment as appropriate, and keep occupants away from the work zone while a wall is open. The person completing the work should use tools and dust-control measures suitable for the materials and room conditions.
Before cutting, compare the speaker template with the marked wall and check the location against the room plan one final time. Confirm that the opening will not land on a stud or known obstruction. For a finished wall, make a small inspection opening only when the route and method have been assessed; avoid enlarging openings without a clear reason. If an unexpected obstacle appears, stop and reassess rather than forcing a cable through a blind path.
Keep drywall pieces and cutout dust controlled. Do not leave loose cable ends where they can fall into the cavity or become difficult to retrieve. Protect the speaker and its grille from paint, joint compound, and dust. If painting is planned, determine whether grilles should be removed and how they will be protected; follow the product instructions so a finish step does not clog or damage the speaker.
Agree in advance on finish responsibility. The electrical contractor may perform the electrical scope, while drywall repair and painting may be handled by another trade or the owner, depending on the project agreement. Confirm who will patch inspection openings, match texture, repaint, and reinstall trim. This avoids the assumption that a clean speaker opening automatically includes complete wall restoration.
How should the electrician and other trades coordinate?
Answer capsule: Share one agreed layout and scope with the electrician, audio installer, remodel contractor, and finish trades. Assign responsibility for openings, wiring, power, inspections, patching, and testing before work is underway.
When more than one trade is involved, use a single marked plan. Identify every speaker, cable endpoint, equipment location, required receptacle, and likely access route. Include room names and orientation, not just a count of cable runs. If a drawing changes, distribute the revised version so no one works from an outdated mark-up.
Discuss the sequence. Framing and electrical rough-in usually need coordination before insulation and wallboard. Audio wiring should be installed and checked while access is available. The project lead can set a hold point for confirming cable labels, continuity, and locations before the wall is closed. In an occupied home, discuss room access, dust control, work hours, and temporary relocation of furnishings.
Clarify the scope in writing. It should state which party supplies the speakers, brackets, cable, and other materials; who makes openings; who checks building conditions; and who connects equipment. It should also explain whether the work includes line-voltage changes, permits or inspections when applicable, testing, drywall repair, painting, and final setup. If any item is excluded, ask what the owner or another trade must arrange.
For planning across more than one room or a larger renovation, Pro Tech Power's full electrical contractor overview offers a starting point for discussing the broader project. The portfolio index also shows examples of project work. Actual scope depends on the building and the agreed plan.
What should a written estimate explain?
A useful estimate explains more than a per-speaker figure. It should describe the known conditions, planned route, included materials, installation approach, and finish assumptions. If the walls have not been opened, the estimate may identify concealed conditions that could change the work. Ask how changes will be reviewed and approved before additional work proceeds.
- Layout: Number and locations of speakers, equipment, and cable endpoints.
- Access: Whether framing is open, whether inspection openings are expected, and what happens if a cavity is obstructed.
- Materials: Cable type, brackets or back boxes, connectors, and speaker-supply responsibilities.
- Electrical scope: Whether a new receptacle or other line-voltage work is included, if needed.
- Safety details: How existing wiring and building barriers will be handled and who verifies applicable requirements.
- Finish work: Protection, patching, texture, paint, grille handling, cleanup, and responsibility for each task.
- Testing: How cable runs and speaker operation will be checked before the project is considered complete.
Compare proposals by scope rather than looking only at the total. One estimate may include access, patching, and testing while another covers only wire and speaker placement. Ask each provider to state assumptions in plain language. If a wall condition is unknown, an estimate should identify the uncertainty instead of promising that every route will be clear.
What common planning mistakes should you avoid?
Choosing a location before checking the cavity: A visually ideal point may be blocked by framing, wiring, plumbing, or a fire block. Confirm the actual wall conditions before cutting.
Planning around the empty room: Furniture and doors change where people listen and what can obstruct a speaker. Include the expected layout and any built-ins in the plan.
Leaving the equipment position until last: A source location far from the planned cable route can complicate access. Decide where equipment will live early and account for power and ventilation.
Using an unmarked cable run: When several wires enter a cabinet, unlabeled ends can lead to avoidable confusion. Label both ends and record the intended room and channel.
Assuming an audio wire can carry power: Concealed power must be handled with an appropriate installation method. Do not hide an ordinary extension cord in a wall.
Forgetting finish work: A technically sound route can still leave an unfinished room if nobody owns the patching and paint. Put finish responsibilities in the project scope.
Making an unplanned change in the field: If an obstruction appears, moving a speaker a few inches may affect alignment or land on a different obstacle. Pause, update the plan, and get approval before changing locations.
How does the plan change between new construction and a finished room?
In new construction, the main advantage is access: framing is visible before wallboard hides it. Use that window to agree on exact speaker positions, identify the route to the equipment area, and coordinate cable with other rough-in work. Confirm that a speaker cutout will not conflict with a stud, brace, cabinet attachment, or future trim. Photograph the open walls and keep a copy of the final layout. Once insulation and drywall are installed, those records can help explain where the cable runs and where any future work should avoid drilling.
Open walls do not make every route simple. Framing details, headers, fire blocks, insulation plans, and other wiring still need attention. The electrician and project lead should review the intended path before the wall closes. If a route passes through a plate or barrier, the appropriate penetration detail should be resolved at this stage, not left as a question for the finish crew. Confirm the installation sequence with the people responsible for electrical rough-in, insulation, and wallboard.
In a finished room, access is limited, so inspection and protection deserve more attention. The installer may assess from an attic, crawlspace, basement, or adjacent room, if those areas are accessible. A borescope or carefully chosen inspection opening may reveal conditions, but tools do not make a blind cut risk-free. Confirm the likely route and the plan for repairing any access openings. If the wall cannot be checked adequately, a surface-mounted option or a revised speaker position may be more practical than forcing a concealed route.
For a remodel, timing is the key difference. If walls will be opened for other work, decide speaker positions before demolition is complete and coordinate wire installation while access is available. Avoid waiting until paint and trim are finished to ask whether the wiring could have been hidden. Put speaker locations on the same drawing used for cabinetry, lighting, and other built-in features, then review any conflicts before rough-in begins.
How should the installation be checked before the wall is closed?
A simple quality check before closing the wall can prevent avoidable troubleshooting later. Confirm that each cable reaches the planned location and equipment point, that both ends are labeled, and that the label matches the room plan. Check the cable path for visible damage, tight bends, unsupported sections, or contact with hazards. The electrician or installer should resolve any concern before insulation or wallboard conceals the route.
Where the project scope and equipment allow, test cable continuity and confirm that each run connects to its intended endpoint. Record the result, the cable label, and the route or access reference. These notes are especially useful when several speakers look alike or multiple rooms share an equipment cabinet. Keep the plan, product documentation, and photos with the home's project records.
After the speakers are mounted, verify that grilles sit evenly, the mounting hardware is secure, and the finished surface around each opening is clean. Then test each speaker at a modest level before increasing volume. Listen for an absent channel, unexpected distortion, loose vibration, or a mismatch between left and right. If something sounds wrong, check connections and the equipment configuration before assuming the speaker itself is at fault. Final sound setup may require adjustments to levels or balance based on the actual room and listening position.
Agree on what counts as completion. For one project, that may mean correctly installed speakers and tested cable runs; another may include equipment connection and final tuning. A written acceptance list makes the handoff clear. It can note that the cable plan and photos were provided, openings were treated as required, finish work was completed by the assigned trade, and any remaining owner tasks were explained.
What questions do homeowners ask about in-wall speakers?
Can in-wall speakers be added to an existing finished room?
Often, but feasibility depends on wall construction, access above or below the room, hidden utilities, and the speaker's mounting needs. An electrician or qualified installer should assess the specific wall before an opening is cut. A route that works in one room may not work in another.
Can I run speaker wire beside electrical wiring?
Do not assume that the two can share a pathway. Applicable rules and the cable and building conditions determine required separation and protection. Have the installer plan the route rather than placing low-voltage cable alongside line-voltage conductors for convenience.
Do speaker wires need a special rating?
The proper cable depends on where it will be installed, the building, and the applicable requirements. Ask the installer to identify the selected cable and confirm that its rating matches the route, including any regulated air-handling space. Product instructions and local rules govern the choice.
Should I add extra speaker locations for future use?
Consider future needs while walls are open, but do not add openings or wire runs without a clear purpose. A planned spare cable may be useful if it is labeled, safely terminated, and included in the project scope. Confirm where it ends and how it will be documented.
Who patches the wall after installation?
That depends on the written scope. Ask whether patching, texture matching, painting, and grille finishing are included or assigned to another trade. Confirm this before work begins, especially when installation requires access openings beyond the speaker cutout.
Discuss your speaker wiring plan
What is the next step?
Put the room layout, preferred speaker positions, equipment location, and wall conditions into one plan, then review the route and finish scope with a qualified electrical professional before any wall is opened. Clear decisions up front help protect the room and make the installation easier to coordinate.