
Residential
Home Audio Installation: Electrical Planning Guide
Pro Tech Power Corp
· 16 Min Read
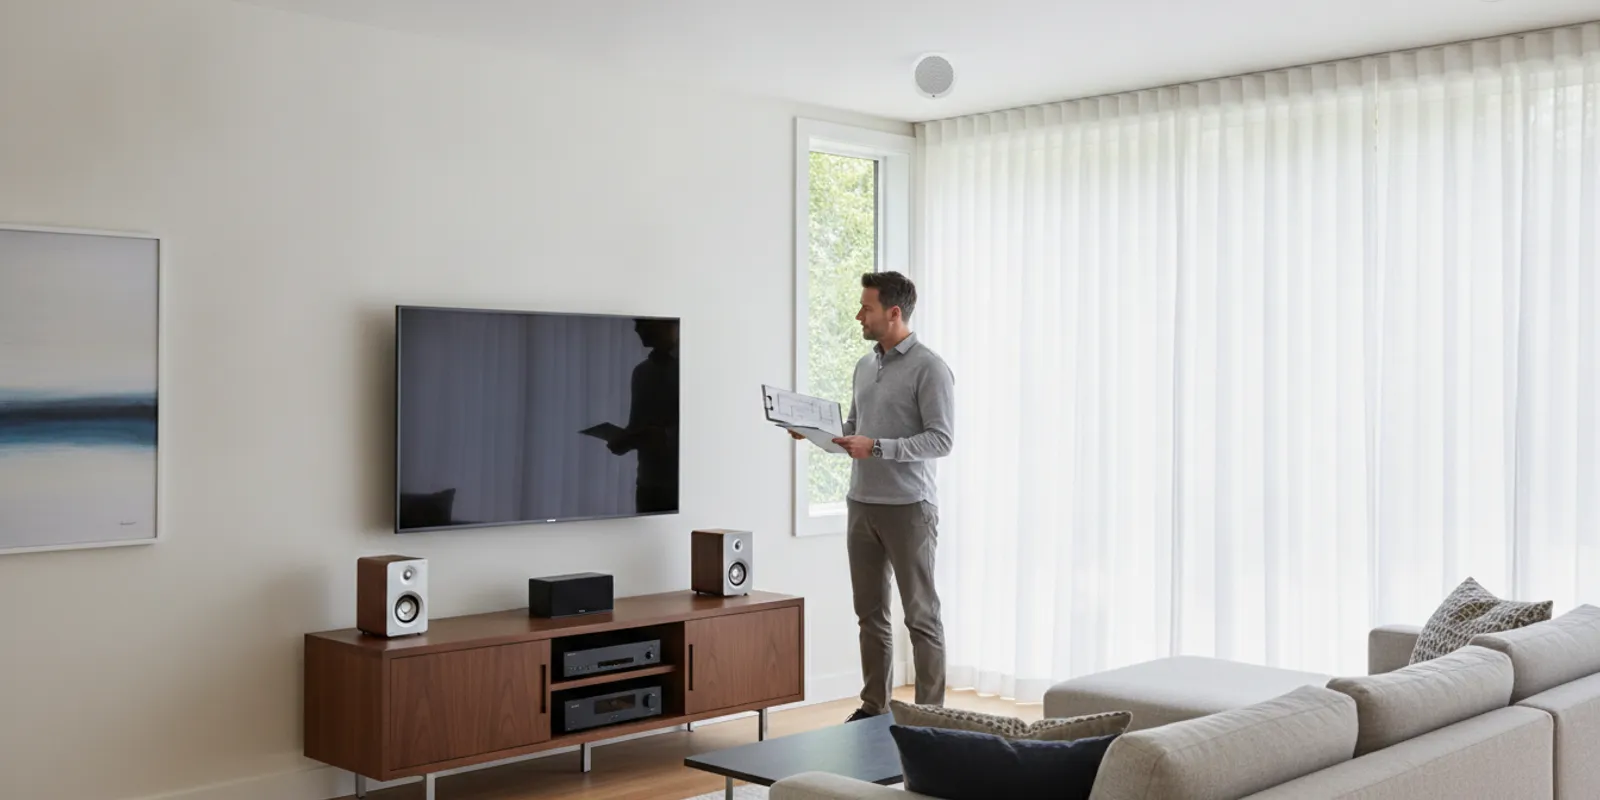
Planning home audio installation is easier when you decide where sound, wiring, and equipment should go before walls are closed or cabinets are built. A little electrical coordination can help keep power equipment accessible, separate wiring paths sensible, and future changes manageable.
What Should You Plan Before Home Audio Installation?
In short: Map the rooms, listening areas, speaker locations, control points, and equipment cabinet first. Then coordinate electrical power and low-voltage routes with the people handling the audio system and construction.
Start with how you expect to use each space. A living room used for everyday background music has different needs from a media room where speakers need to work together for movies. List the rooms that need sound, whether they need independent controls, and whether you want audio to continue between rooms.
- Room use: Note where people sit, walk, cook, work, or watch a screen.
- Listening zones: Decide which rooms should play the same source and which should have separate volume or source control.
- Speaker positions: Mark proposed ceiling, wall, or freestanding speaker locations, then check them against lighting, vents, beams, doors, and furniture.
- Equipment location: Choose a practical spot for amplifiers, network equipment, source devices, and controls.
- Future changes: Identify likely additions, such as another room or a different display, so pathways can be considered while access is available.
Draw a simple floor plan and label each speaker, display, control, equipment location, and cable route. Include approximate furniture placement. A plan does not need to specify every technical detail; it should give the electrician, low-voltage installer, builder, and homeowner a shared starting point.
Walk through the plan from the listener's point of view. A ceiling speaker should be placed for the room's use, not simply centered between walls if that puts it over a cabinet or outside the listening area. A display location affects where power, signal cables, and any equipment shelf should land. Mark doors and built-ins, too; a route that looks clear on an empty plan can be blocked once the room is furnished.
For a multiroom setup, write down what should happen in ordinary use. For example, note whether the kitchen and dining area should share one source. Or whether someone should be able to listen in one room while another source plays elsewhere. These are planning prompts, not a promise that a particular product can perform every function. Confirm system capabilities with the audio installer before electrical locations are finalized.
Make a room-by-room schedule rather than relying on a single note that says "whole-home sound." For each space. Record the intended use, approximate listening area, speaker count or type if known, control method, and route back to the equipment. A kitchen might need sound centered on the work area, while a dining space may be used more occasionally and share a zone. A bedroom may need local volume control without changing what is playing in a common room. Those distinctions help prevent a system from being technically connected but awkward in daily use.
Mark both fixed features and items that may move. A ceiling joist, recessed light, supply vent, fireplace, built-in bookcase, or sliding door can affect speaker placement or cable access. Furniture matters too: a sofa moved a few feet can change the listening area, and a tall cabinet can block a wall speaker. When the plan is still flexible, sketch two or three possible locations and ask the audio installer to identify which choice best suits the equipment and room.
For examples of electrical work across different project types, browse the project portfolio. The home office wiring guide offers a related example of coordinating a room's power and technology needs.
How Do Power Circuits Affect an Audio System?
In short: Identify the system's power requirements and the loads already using nearby circuits. An electrician can assess whether the planned equipment can use existing power or whether a different circuit arrangement is appropriate.
Audio equipment needs dependable power, but there is no single circuit plan that suits every home. The right approach depends on the equipment manufacturer's instructions, the system's size, the existing electrical layout, and what else shares the circuits. A compact setup with a television and a few components differs from a media room with multiple amplifiers, a projector, network devices, and powered subwoofers.
Make an equipment list before deciding on outlets or circuit changes. Include model information when available, anticipated location, and any stated electrical requirements. The electrician can review that information alongside the panel and the actual wiring conditions. Do not assume that an open breaker position means an existing circuit has spare capacity, or that moving equipment to another outlet solves a persistent electrical issue.
| System area | What to identify | Planning question |
|---|---|---|
| Media cabinet | Amplifier, receiver, source devices, network hardware | Is outlet access clear, and do equipment instructions call for a particular arrangement? |
| Display area | Television or projector and associated equipment | Where should power and signal pathways arrive without visible cord runs? |
| Powered speakers or subwoofer | Locations and manufacturer power needs | Will each location have practical, code-compliant power access? |
| Whole-room system | All equipment and other nearby electrical loads | Should an electrician evaluate circuit capacity or a separate circuit? |
A separate circuit is not automatically required for every home audio setup. It may be considered when the equipment instructions, load assessment, or project conditions indicate it is appropriate. Have a licensed electrician determine whether new wiring, a circuit change, or other electrical work is needed. Never use repeated breaker trips, warm outlets, buzzing, or flickering as a reason to keep testing a system; stop using the affected equipment and arrange an electrical evaluation.
Keep a few distinctions clear during planning. A power strip does not increase the capacity of the branch circuit feeding it. A receptacle's location also does not tell you what else is connected to that circuit. If the room is being remodeled, describe all planned electrical additions together, including lighting, window coverings, displays, and other equipment. A complete picture gives the electrician better context than a request for a single outlet in isolation.
Consider the equipment in groups. A receiver, streaming device, network hardware, and television may all be placed at one cabinet, while a powered subwoofer or projector sits elsewhere. Write down what plugs in at each point and whether a device needs to remain on continuously. This does not determine the circuit design by itself, but it gives the electrician a clearer picture of expected loads and of where accessible receptacles may be needed.
For example, suppose a media room is planned in a finished basement. The proposed cabinet has a receiver, game console, network equipment, and display, while a powered subwoofer sits near the seating area. The useful planning question is not simply "How many outlets should go behind the cabinet?" It is also whether existing circuits supply other loads. Whether the equipment instructions identify requirements, where cords can reach safely, and whether future access will remain practical. Provide the full list and let an electrician assess the actual wiring.
When a project includes other changes to the home's wiring or electrical panel, account for them at the same time. The company's residential electrical services provide a starting point for broader electrical planning questions. The home electrical safety guide also covers warning signs that should prompt a closer look.
How Should Low-Voltage Wiring Be Coordinated?
In short: Plan speaker, network, and signal cable routes with the electrician and low-voltage installer before construction. Keep the route clear, accessible where practical, and coordinated with electrical wiring and building conditions.
Speaker wire and other signal cables serve a different purpose from branch-circuit wiring, but they still need thoughtful routing. Mark where cables start and end, which room or speaker each run serves, and where extra length or accessible termination points may be useful. A labeled plan can save time when equipment changes or a connection needs attention later.
Do not assume low-voltage cables can be routed wherever convenient. Separation, pathway, firestopping, and other installation requirements depend on the building and applicable rules. Cable type and routing method also matter. Have the installers coordinate rather than improvising a path through a wall, ceiling, or electrical space.
- Keep proposed signal routes away from avoidable sources of interference and from locations that could expose cables to damage.
- Coordinate crossings or shared pathways with the electrician instead of placing cables together without review.
- Confirm where the cables will emerge at the media cabinet, display, speakers, and controls.
- Label both ends of each run and document concealed routes before drywall or finish work hides them.
- Ask who is responsible for testing each cable and recording any changes from the plan.
If you are remodeling, discuss the audio plan before insulation and wall finishes. If the home is already finished, ask the installers how they propose to access each location and restore affected surfaces. The practical route may differ from the shortest route on a drawing.
Review the route in stages. First identify the source and destination for each cable: for example, equipment cabinet to left speaker, cabinet to right speaker, or network point to display. Next, mark the likely pathway through the structure and note obstacles such as a fireplace chase, built-in cabinetry, a finished ceiling, or areas that are difficult to access. Finally, confirm the termination point and labeling method with the installers. This sequence makes it easier to notice a missed connection before the wall is closed.
Keep power and signal decisions coordinated without assuming the same person handles both. The electrical contractor and low-voltage or audio installer should know the other party's plan. Particularly where pathways approach one another or where a display needs both power and signal connections. Agree in advance who will supply and install each cable, who will make each termination, and who will test the completed run. A simple responsibility list prevents last-minute uncertainty.
For an existing home, compare the disruption of different access routes. A route through an accessible attic or basement may be preferable to opening a finished wall, but suitability depends on the house and the installers' assessment. For a new build, document concealed routes with dated photographs and a marked plan before drywall. Include the room name and cable labels in the notes, since a photograph without context may be hard to interpret years later.
Where Should Audio Equipment and Controls Go?
In short: Choose equipment locations for access, ventilation, cable reach, and everyday use,not just appearance. Plan outlets and cable entries around the final cabinet or rack layout.
A cabinet can hide equipment, but it should not make routine use difficult. Check that components can be reached for setup and that the manufacturer's instructions for ventilation and clearances can be followed. Avoid placing equipment in a sealed or cramped space without confirming it is suitable. Consider how doors open, where cables bend, and how a homeowner can see status indicators or connect a temporary device.
Decide whether controls will be mounted at a wall, used from a phone or tablet, or handled at the equipment itself. If controls need power, network connectivity, or a specific cable route, include that need in the plan. Do not finalize switch, outlet, or control positions until cabinet dimensions, display height, and furniture placement are reasonably settled.
For each equipment location, review these practical details:
- Is there a safe, accessible source of power appropriate for the equipment?
- Can the equipment shed heat as directed by its manufacturer?
- Can cables be identified and disconnected without moving heavy furniture or dismantling built-ins?
- Will the location remain accessible after storage, doors, and trim are installed?
- Could a future change be made without opening finished walls again?
Power and data needs may overlap in a media room, but they should be planned as distinct parts of the project. A clear equipment schedule helps the electrician coordinate receptacles and circuits while the low-voltage installer plans signal and network connections.
Think about access at several time scales. During installation, a technician may need room to connect, configure, and test several components. In everyday use, a homeowner may need to restart a device, change a connection, or see a status light. Later, a television, receiver, or streaming device may be replaced with a different model. If the cabinet is designed around one exact collection of boxes, allow enough flexibility for different dimensions and connections.
Ventilation deserves attention when equipment is concealed. An enclosed cabinet can trap heat, especially when several powered devices are stacked together. Follow each manufacturer's spacing and airflow instructions, and discuss the cabinet design with the audio installer or cabinet maker. Do not assume that a small opening in a door is enough; confirm the actual arrangement against the components being installed.
Make cable entries deliberate. A bundle entering behind a cabinet should be reachable without pinching cords against the wall or blocking a door. Leave a clear path to connect devices and avoid placing receptacles where a cabinet will make them inaccessible. At a wall-mounted display, coordinate the screen height, mount, outlet. And signal connections so that cables do not interfere with the bracket or protrude where the screen sits close to the wall.
Controls should match how residents use the room. A wall control may be convenient near an entry, while handheld controls may be more useful near seating. If a system depends on a home network, consider the network equipment location and the connection needed at the audio equipment. These choices should be checked against the selected system rather than assumed to be interchangeable across products.
When Should an Electrician Be Involved?
In short: Bring in a licensed electrician whenever the plan may change fixed wiring, add or move receptacles, alter circuits, or raise questions about electrical capacity, permits, or safety.
Some audio components simply plug into existing receptacles. Other projects include new outlets behind a display, power at a ceiling-mounted projector, concealed wiring, a new circuit, or electrical changes as part of a remodel. Work on a home's electrical system should be evaluated by a qualified, licensed professional. An electrician can review the existing conditions, discuss the proposed scope, and identify whether permits or inspections apply.
Permit requirements depend on the specific work and property. Portland's residential electrical permit guidance explains when a permit is needed for covered residential projects and how to apply. The city's Title 26 electrical regulations are another official reference. Check the rules for the actual project location; a Portland page should not be treated as a substitute for requirements in another jurisdiction.
Ask the electrician to clarify the boundary between line-voltage electrical work and low-voltage audio installation. The parties should agree on who supplies cable, who installs it, who makes terminations, who tests the system, and who handles any required electrical inspection. This avoids gaps where each installer assumes the other is responsible.
A useful project handoff includes the floor plan, equipment list, proposed cable paths, outlet locations, and a note about what is changing in the walls or panel. If your audio project is part of a broader home update, use the contact page to discuss the electrical scope.
Involve the electrician early enough to review the plan before any fixed wiring is installed or concealed. For a renovation, that usually means sharing information before rough-in and finish schedules are set. For a new home, bring the proposed speaker and display locations into the conversation while framing and cabinetry decisions are still open. Early coordination does not require that every model number be final; it does require a clear description of likely equipment, room use, and planned changes.
During the first conversation, ask what information the electrician needs to evaluate the electrical portion. How the proposed changes relate to existing wiring, and whether the work may require an application or inspection. Ask the audio installer similar questions about cable type, routes, terminations, and system testing. Keep the answers in one shared project record so that revisions are visible to everyone involved.
If you notice repeated breaker trips, a hot or discolored receptacle, a burning odor. Unusual buzzing, or flickering that accompanies equipment use, stop using the affected setup and arrange an evaluation. Do not open an electrical panel or attempt to change fixed wiring as a troubleshooting step. A symptom can have more than one cause, so the safe next step is an assessment of the actual installation.
What Is a Practical Planning Sequence?
In short: Design the room use first, coordinate equipment and wiring next, then confirm electrical scope and permitting before installation begins.
- List the listening zones. Mark which rooms need sound and whether each zone should be controlled separately.
- Place speakers and displays. Check positions against seating, lighting, framing, vents, and the intended viewing angle.
- Choose equipment locations. Identify cabinets, racks, controls, network equipment, and access needs.
- Share the equipment schedule. Provide available model and power information to the electrician and audio installer.
- Coordinate the pathways. Review cable routes, power locations, access, labeling, and responsibility for testing.
- Confirm electrical scope. Have a licensed electrician assess any fixed wiring, circuit, or receptacle changes and determine permit needs.
- Document before closing walls. Photograph concealed routes and keep the final drawing with the home's project records.
- Test and label. Confirm each zone, control, and connection works as intended before the project is considered complete.
For a new build or major remodel, make these decisions early enough to coordinate with framing, cabinetry, and finish schedules. For an existing home, begin with a walk-through and a realistic assessment of access. The planning sequence is the same, even if the installation method changes.
Use a short planning packet to keep the sequence practical. Page one can be a floor plan with rooms, seating, displays, speakers, and controls. Page two can list equipment with model information and locations. Page three can show proposed cable paths, outlet positions, and any known construction work. Add a final page for open questions, assigned responsibilities, and decisions that still need confirmation. A compact packet is easier to review than scattered messages and photos.
Before work starts, walk through the plan with the household. Ask whether the listed zones reflect real routines: where someone listens to music while cooking. Whether television audio should remain in one room, and which rooms should be quiet independently. Confirm that speakers will not land directly over a frequently used work surface or in a location likely to be blocked by a tall cabinet. Small revisions on paper are easier than changes after finishes are complete.
At rough-in, compare installed locations with the approved drawing. If a beam, duct, or framing condition forces a change, have the installers record the revised route and location before concealment. At completion, keep the updated plan, equipment list, cable labels, and any permit or inspection documentation with the home's records. That material can help when a component is replaced or a room is altered later.
For additional planning context, the outlet planning guide describes considerations around receptacle work, and the company background provides more information about the electrical contractor. These are useful starting points, while the actual project plan should be based on the home's wiring, selected equipment, and applicable local requirements.
Request a free estimate for your electrical planning
Frequently Asked Questions
Does home audio installation always need a dedicated circuit?
No. The need depends on the equipment, its instructions, existing circuit conditions, and the planned electrical work. An electrician can assess the setup rather than relying on a general rule.
Can speaker wire run in the same pathway as electrical wiring?
Do not assume that it can. Routing rules and appropriate separation depend on the installation and applicable requirements. Coordinate the pathway with the electrician and low-voltage installer before cables are concealed.
Should I choose speaker locations before or after a remodel?
Choose and coordinate proposed locations before walls and ceilings are finished. You can refine equipment choices later, but early planning makes it easier to review cable paths and avoid conflicts with framing, lights, and vents.
Who installs the audio equipment?
The audio system and its low-voltage wiring should be planned with the appropriate audio or low-voltage installer. A licensed electrician should handle electrical work such as adding or moving receptacles or changing fixed wiring. Confirm responsibilities before work begins.
What information should I have ready for an estimate?
Bring a room plan, desired listening zones, likely speaker and display locations, equipment details if available, and a description of any planned remodel work. Photos of the panel and proposed equipment locations can also help start the conversation.
A coordinated plan helps your audio system fit the home while keeping electrical work, low-voltage routes, and equipment access clear from the start.