
Lighting
Deck Lighting Electrical Wiring: What Planning Is Needed?
Pro Tech Power Corp
· 17 Min Read
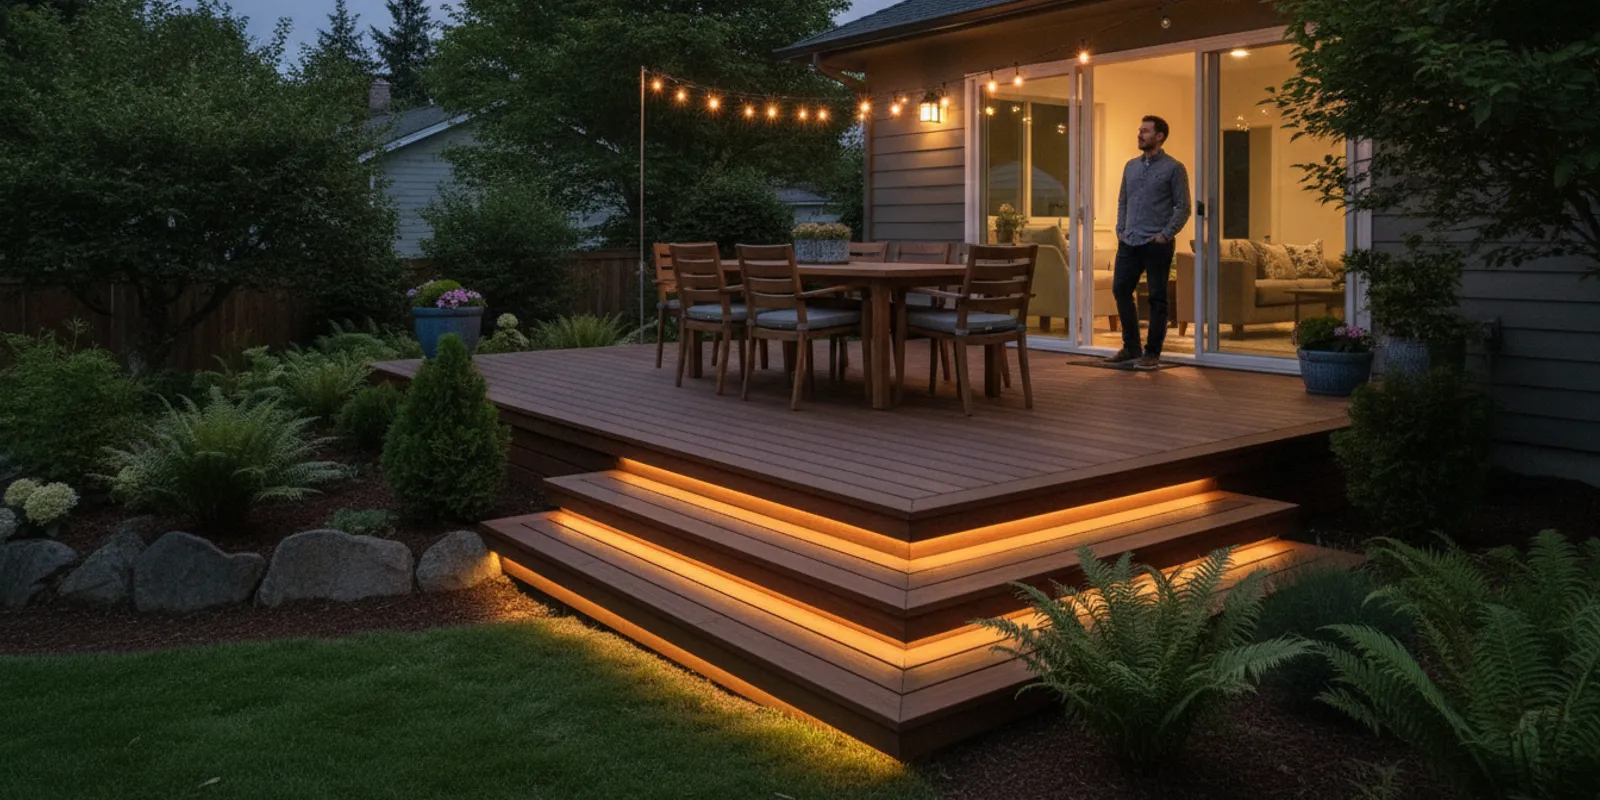
Deck lighting electrical wiring should be planned around how people use the deck, where fixtures can go, and how power can reach them. A stairway, dining table, path to the yard, and seating corner each call for different light. A clear plan connects those needs to a suitable system, wiring route, controls, and weather-appropriate equipment before installation starts.
Request an electrical planning assessment
What should you decide before planning deck lighting?
Start with the way the deck functions, not a fixture catalog. Walk the space after dark if that is practical, or look at a sketch of it. Notice where people enter, move between levels, sit, eat, and carry items. The goal is to distinguish essential illumination from accents and to make the desired result understandable to the electrician.
- Mark each stair, landing, gate, door, and change in elevation.
- Identify dining, cooking, and seating areas that need useful light.
- Note views from inside the home and locations where glare might bother someone seated or shine toward a window.
- Record existing outdoor fixtures, switches, and receptacles from a safe distance; do not open electrical equipment.
- Decide whether the priority is orientation, task visibility, atmosphere, or a combination.
For example, a family that mostly uses the deck for meals may want one well-lit table area and low-level stair illumination. A household that frequently walks between the deck and yard may care more about a continuous route and a clearly visible gate. Those are different layouts, even if both use similar fixtures. This first pass is a planning brief, not a wiring design.
For context about the broader electrical work a contractor may assess, see the electrical work overview. Keep the lighting request specific: describe the deck, intended uses, and desired effect rather than asking for a generic number of lights.
How do use and layout shape the fixture plan?
Divide the deck into zones and consider each zone separately before deciding whether fixtures should operate together. Stairs need visible edges and consistent illumination. A dining table needs light on its surface without shining into diners’ faces. A doorway can benefit from a useful transition. Rail or post fixtures can define a boundary, but too many can clutter the railing or create glare.
Draw a simple plan to scale if possible. Include the house wall, doors, stairs, posts, railings, furniture, and possible fixture points. Add arrows for the direction fixtures will face. A quick drawing often shows that a light aimed across a railing would hit a seated person’s eyes, or that a proposed row leaves a dark gap by the gate. You do not need to select final products to do this useful first step.
| Deck area | Planning purpose | Questions to resolve |
|---|---|---|
| Stairs and level changes | Make tread edges and transitions easier to see | Can a person see the route without looking into a bright source? |
| Dining surface | Provide practical light for meals and cleanup | Will light reach the table without creating face-level glare? |
| Walkway or gate | Help people follow the route between deck and yard | Are there dark breaks between the door, deck, and gate? |
| Seating area | Provide comfortable ambient illumination | Can users operate or adjust the light conveniently? |
| Rail and perimeter | Define an edge or add a restrained accent | Will fixtures create glare or interfere with the railing? |
Use the table to frame decisions rather than as a spacing formula. Fixture output, beam direction, mounting height, surface color, and nearby walls all affect the result. One bright fixture may create a sharp pool of light and dark shadows; several carefully aimed lower-output fixtures may distribute light more evenly. The actual selection needs to account for products and site conditions.
Work through a simple layout example
Imagine a rectangular deck with a house door at one end, stairs near the opposite corner, and a dining table in the middle. First mark the door-to-stair walking route. Then note whether a person approaching the stairs can see the first tread from the deck. Mark a table zone and consider a fixture direction that lights the tabletop while limiting glare to people sitting around it. Finally, review the plan from the yard and indoors. This sequence may reveal that a light near the door is useful for entry while a separate stair zone is needed for safe movement.
Resist the temptation to treat every post or board as a fixture location. A balanced plan should solve a real use need, preserve a clean appearance, and avoid unnecessary overlap. A site visit can account for the structure, mounting surfaces, doors, and sight lines that a sketch cannot show.
Which power approach fits the project?
Deck fixtures may use a low-voltage system or line-voltage wiring. A low-voltage arrangement uses a transformer to supply compatible fixtures. Line-voltage fixtures connect to a suitable branch circuit. Neither label alone determines which approach is appropriate. Product specifications, load, available power, route, controls, exposure, and installation conditions all matter.
Do not choose only by comparing voltage numbers or assuming that a packaged kit is automatically easier. Review the complete product plan. With a low-voltage setup, the transformer location and rating, connected load, cable path, and compatibility of fixtures and controls need attention. With a line-voltage arrangement, the electrician must assess circuit capacity, wiring method, switching, and required protection. The actual conditions determine the design.
| Planning factor | Low-voltage arrangement | Line-voltage arrangement |
|---|---|---|
| Power source | Compatible transformer and fixtures | Suitable branch circuit and fixtures |
| Layout questions | Transformer position, cable path, connected load | Circuit capacity, switching, wiring route |
| Product coordination | Fixtures, transformer, and controls must work together | Fixtures and controls must match the electrical design |
| Useful next step | Review all selected equipment and the installation location | Review circuit, protection, and installation requirements |
This comparison does not establish that one option is always safer, simpler, or less costly. Material and labor vary with access, distance, deck construction, existing capacity, equipment selection, and the amount of installation work. Ask for a written scope that states the proposed arrangement and assumptions. If you have a product kit in mind, provide its specifications before the design is settled.
What should you know about wiring routes?
The visible fixture plan is only half the work. A route must connect the fixtures to the source while respecting the deck structure and the conditions outdoors. Depending on the site and approved wiring method, a route may use the underside of the deck, posts, a wall, or another suitable pathway. A qualified electrician can inspect access, identify obstacles, and determine appropriate materials and methods.
Describe whether the underside is open, enclosed, or finished. Mention the deck material, railing type, distance to potential power, and any planned replacement of boards or stairs. If there is a finished room below, say so before estimating; access and concealment may be different than under an open deck. If construction or remodeling is planned, coordinate the lighting before surfaces are closed.
Do not cut, drill, or notch structural members to create a route without appropriate approval. The route has to respect the structure as well as the electrical design. Ask how the wiring will be protected from impact, moisture, sharp edges, and routine upkeep. Ask where any equipment or connection points will remain accessible. The answer should be tied to your deck, not a generic drawing.
Compare route options by access and disruption
For an open underside, an electrician may have more direct access to inspect a route, though joists and other obstructions still matter. For a deck with a finished ceiling below, a concealed route may require additional access planning. A route along a wall may reduce work beneath the deck but can affect appearance and mounting details. These are examples of tradeoffs, not promises that a particular route will be feasible. Ask the contractor to explain the preferred route and any alternate if an obstruction is discovered.
Take photos from several angles, including the underside where safely visible, the house connection area, and the route toward the stairs. Photos help explain the site, but they do not replace inspection. Avoid moving panels, accessing a crawl space, or approaching exposed wiring to get them.
How do weather, mounting, and materials affect the plan?
Deck equipment faces outdoor conditions. Fixtures and associated components should be intended for their actual locations, and the installation should follow manufacturer instructions. A light beneath an overhang may have different exposure than one directly exposed to rain. The electrician should review product ratings, mounting surface, connections, and any required protection for the specific placement.
Consider how a fixture attaches to wood, composite boards, masonry, or siding. A product image may not show the backing, clearance, or cable entry that its installation requires. Account for drainage details, expansion gaps, and access to components that may need inspection. Equipment should not be hidden behind permanent construction where access is required.
Also review the daytime appearance. Small lights can interrupt a railing line if placed without a pattern. Aligning fixtures with posts or stairs may look more intentional, but the structure and the product determine whether those positions work. View the proposed layout from the house, the yard, and typical seating positions. Consider whether a bright fixture will be visible through a nearby window after dark.
Consider the maintenance path, not just the installation
Before approving locations, ask how each fixture will be reached for inspection or replacement. A light placed behind a planter, built-in bench, or permanent trim may be inconvenient later. Similarly, make sure proposed equipment does not block access to deck fasteners or other components that need routine attention. A layout that is attractive on paper should also be practical to maintain.
Include cleaning and seasonal use in the discussion. Deck furniture may move, planters may grow, and a railing may be repainted. These changes can affect light output or access. You do not need to predict every future change, but flag fixed features and planned improvements before choosing locations.
Where should switches and controls go?
Controls shape day-to-day convenience. Decide whether users should switch the lights near a door, from inside the home, or from another appropriate location. Then decide which lights should work together. Stair lighting and a dining area may serve different purposes, so separate zones could be useful. More zones can offer flexibility, but may add wiring and control decisions.
Timers, photocells, dimmers, and smart controls may be considered, but compatibility is essential. Confirm that a control works with the selected fixtures, transformer, and electrical arrangement. Ask whether it requires a particular enclosure, conductor, or installation condition. Do not assume that a device marketed for outdoor use works with every lighting system.
Make a small control schedule before the assessment. For example: “Switch A: stairs and route; Switch B: dining and seating.” It is only a starting proposal, but it forces the household to decide whether accent lights should always come on with task lighting. If several people use the deck, ask them to review the plan. A control scheme that makes sense to one person may be confusing to guests.
If controls are being added to existing electrical equipment, have the existing conditions checked. Fixture count alone cannot establish circuit capacity or available space. The electrician can assess what can be reused and what changes may be required.
How should you plan for safety and code review?
Electrical requirements depend on the equipment and installation. An electrician should determine applicable rules, wiring method, protection, grounding and bonding needs, and any permit or inspection requirements. Do not treat a product diagram or online checklist as a substitute for review of the actual site and current local requirements.
The Oregon state government website is a starting point for locating official state information. Confirm current electrical requirements and permitting questions with the appropriate authority and your electrical contractor. The relevant answer depends on the scope of work and local jurisdiction.
Homeowners should not work inside energized electrical equipment or improvise outdoor connections. Do not use extension cords as a permanent replacement for designed wiring. If you see damaged insulation, exposed conductors, water intrusion, or an unusually hot fixture, stop using the affected equipment when safe and seek qualified help. Never touch a damaged conductor.
Questions that keep the review grounded
- Which components are intended for the exact exposure and mounting locations?
- What wiring method and route are proposed, and how will the route be protected?
- What existing electrical conditions need assessment before work is priced?
- Who confirms permit and inspection requirements for this scope?
- What product instructions or documentation should be retained after installation?
These questions do not replace the contractor’s design or the authority’s requirements. They help you understand the reasoning behind the scope and identify decisions that remain open before work begins.
What information helps an electrician assess the project?
A focused assessment is easier when you describe the desired result and provide relevant site details. A simple plan with approximate dimensions is useful; it does not need to be a construction drawing. Daylight photos can show the deck, stairs, house wall, underside, and potential equipment locations.
- Approximate deck dimensions and the number and location of stairways.
- Where people enter, walk, sit, and dine after dark.
- Photos of the deck, underside when safely visible, and nearby installation areas.
- Fixture models or specifications, if already selected.
- Preferences for separate zones, dimming, timers, or other controls.
- Remodeling, landscaping, or deck work that may affect access or route choices.
- Existing outdoor lighting or electrical concerns that need review.
Be clear about the main outcome: visible stair edges, a softly lit table, a clean railing, or a combination. This lets the electrician discuss tradeoffs rather than guess at the goal. You can review the project portfolio for examples of electrical work in different spaces; it is not a substitute for a deck-specific design.
A useful one-page project brief
Make a short note with four parts: how the deck is used, which zones need light, what controls you prefer, and what construction is planned. Attach a sketch and a few photos. Include a line for unknowns, such as whether a nearby circuit can support the proposed equipment. Marking something as unknown is better than guessing; it tells the electrician what the assessment must resolve.
For instance, a homeowner might write: “We use the deck for dinner and to reach the garden. Priorities are table visibility and the stair route. We prefer separate controls if practical. The underside is enclosed and new boards are planned this spring.” That concise description gives useful context without prescribing an unsafe route or assuming the system.
How can you compare project proposals?
Compare proposals by scope, not just by the total. A useful written proposal should describe the fixtures or allowances, power approach, wiring route assumptions, controls, installation locations, and exclusions. It should explain what could change the scope, such as concealed obstructions, unavailable access, or a product selection that differs from the allowance.
Ask whether the scope includes assessing existing circuit capacity, new circuit or control work if needed, outdoor equipment protection, and coordination with other construction. If the fixture selection is not final, clarify whether the price includes specified products or an allowance. Confirm who supplies fixtures and who verifies they suit the intended location.
| Proposal item | What to look for | Follow-up question |
|---|---|---|
| Fixture scope | Named products or a clear allowance | Who selects and supplies the final fixtures? |
| Power arrangement | System and assumptions described | What site condition could change this choice? |
| Route | Expected path and access assumptions | What is the alternate if that route is blocked? |
| Controls | Zones, switch locations, and included devices | Are controls compatible with the selected equipment? |
| Exclusions | Unincluded repairs, access, or finish work identified | How will added work be reviewed and approved? |
If comparing multiple bids, provide each contractor with the same sketch, product preferences, and use priorities. Otherwise, one proposal might include distinct zones while another assumes a single control, making totals difficult to compare. Ask each to identify assumptions in writing. Do not treat a low total as equivalent if it leaves important fixture or route details unresolved.
For a broader residential or commercial project, the company overview provides context about Pro Tech Power. The regional coverage information can help readers determine whether to ask about a project in their area. For an estimate or assessment, use the contact page.
What project sequence should you expect?
Every property differs, but a practical planning sequence starts with use and ends with a verified scope. The layout informs fixture selection; the products affect wiring and control choices; the site assessment tests those assumptions against actual construction and electrical conditions.
- Describe the use. Explain activities, walking routes, and the areas that need illumination.
- Sketch the zones. Mark the door, stairs, seating, table, boundaries, and possible fixture points.
- Discuss products and controls. Share preferences or specifications without assuming compatibility.
- Review existing conditions. Have a qualified electrician assess capacity, access, mounting, and route options.
- Confirm the written scope. Review products, route, controls, exclusions, and any approval or inspection steps.
- Coordinate timing. Align electrical work with deck construction, painting, landscaping, or other trades.
- Review the completed result. Confirm intended zones and controls, and ask about product instructions and documentation.
For a deck remodel, bring the electrical discussion forward before boards, soffits, or walls conceal access. If the deck is already finished, discuss the appearance and disruption of each practical route. Keep decisions about fixture locations and control zones in writing so the installed work matches the agreed plan.
Which planning mistakes can create avoidable changes?
- Choosing products before mapping use. An attractive fixture may not illuminate the stairs or table well.
- Assuming all outdoor fixtures can share one system. Compatibility and capacity need review.
- Ignoring underside access. Enclosed space, joists, and finished surfaces may affect routing.
- Deferring controls. Switch position and lighting zones are easier to discuss early.
- Closing surfaces before coordination. Settle route and timing questions before construction hides access.
- Comparing proposals with different assumptions. Align the fixture, control, and route scope first.
- Using a universal spacing rule. Output, beam, mounting, and surroundings change the result.
- Overlooking glare and upkeep. Check sight lines and access from the places people actually use.
Resolving these issues early cannot reveal every concealed condition. It does make assumptions visible so the homeowner and electrician can discuss them before approving the work.
How can you work through two common deck scenarios?
Scenario one: an open deck being rebuilt
Suppose the deck boards and railings are already scheduled for replacement. The homeowner wants stair lights and a softer dining zone. The useful first move is to coordinate the electrical plan before the new surfaces are installed. Mark the stair geometry and table location, discuss mounting options, and ask the electrician to assess where a route can pass without interfering with structural elements. Confirm which decisions must be made before the carpenter closes or covers access.
In this case, the open underside may make inspection easier, but that does not establish the final route or fixture type. Ask whether locations need backing or a specific cable entry, and confirm who coordinates openings and finish details. Write down the selected zones and controls so the trades work from the same plan.
Scenario two: a finished deck with an enclosed underside
Now consider an existing deck with a finished ceiling below and no selected products. The owner wants better visibility at the stairs and a light near a seating area. Begin with a sketch and photographs, then tell the electrician that the underside is enclosed. Ask which route options are feasible, what access or finish work they might involve, and whether surface-mounted equipment is an alternative worth discussing.
Do not assume that a particular hidden route can be added without opening finishes. The assessment should establish what can be accessed, what the homeowner is willing to change, and whether the desired locations can be served practically. Compare proposals on the same understanding of access and restoration work, not just fixture count.
What these cases illustrate
The same lighting goal can lead to different scope because construction and access differ. In both cases, an early sketch, honest description of site conditions, and written clarification of assumptions make decisions easier. The electrician still has to verify the wiring method and equipment for the specific project.
Frequently asked questions
Can I use low-voltage lights on every deck?
Not automatically. The fixtures, transformer, connected load, wiring route, and installation conditions must work together. Have the actual equipment and deck assessed before selecting a system.
Should deck lights be on their own switch?
It depends on how the deck is used and whether separate zones would be helpful. Decide which lights should operate together, then confirm control compatibility and wiring requirements with the electrician.
Can wiring be added after a deck is built?
It may be possible, but access beneath the deck, finished surfaces, and the route to a suitable power source affect the work. An assessment can identify practical options and limits.
Do I need a permit for deck lighting?
Permit and inspection requirements depend on the scope and applicable local rules. Ask the electrical contractor and relevant local authority to confirm requirements for your project.
What if I have not chosen fixtures?
Describe the desired effect and share a preliminary layout. The electrician can explain which product specifications matter and what decisions must be made before the scope is final.
Discuss your deck lighting plan
Good deck lighting starts with a clear purpose, then connects each zone to compatible equipment, a practical route, and controls people can use. Prepare the layout and site details, and have a qualified electrician review the electrical design before installation.