Your Guide to Level 2 Charger Installation Requirements
All the talk about 240-volt circuits, amperage, and electrical panels can make installing a home EV charger sound intimidating. While it is a complex job, the concepts behind it are straightforward once they’re explained in simple terms. Our goal is to demystify the process for you. We’ll cut through the technical jargon and give you a clear, easy-to-understand overview of the level 2 charger installation requirements. By the end of this guide, you’ll know exactly what your home needs to support faster charging and feel prepared to have a confident, productive conversation with a licensed electrician for EV charger installation. If the assessment shows your panel is undersized, you may also need an electrical panel upgrade in Portland. When you are ready, request an electrical assessment.
Key Takeaways
- Level 2 chargers are the ideal home solution: They use a 240-volt circuit, just like a major appliance, to fully charge your EV overnight, making them much faster and more convenient than a standard wall outlet.
- Always hire a licensed electrician for installation: A Level 2 charger requires a dedicated circuit and a professional assessment of your home’s electrical panel to ensure the installation is safe, meets all local codes, and protects your property.
- Plan ahead to manage installation costs: The total price includes the charger, labor, and potential electrical upgrades; you can keep costs down by choosing a charger that fits your car’s needs and selecting an installation spot close to your electrical panel.
What Is a Level 2 EV Charger?
If you own an electric vehicle, you’ve probably heard about Level 2 chargers. Think of it as a major upgrade from the standard charger that came with your car. While that basic charger, known as a Level 1, plugs into any regular wall outlet, a Level 2 charger is a more powerful, faster way to charge your car at home. It operates on a 240-volt circuit, the same type of high-power outlet used for an electric dryer or oven. This higher voltage is the secret to its impressive speed.
Instead of waiting a full day or more for a complete charge, a Level 2 charger can power up your EV in a fraction of the time, typically between four and eight hours. This makes it a practical and popular choice for EV owners who want the convenience of waking up to a fully charged battery every morning. Because it requires a dedicated 240-volt circuit, installing one isn’t a DIY project. It’s a job for a professional electrician who can ensure everything is set up safely and correctly. This type of installation is a common project that fits right in with other residential electrical work and ensures your home is properly equipped for your vehicle’s needs.
Level 1 vs. Level 2 vs. DC Fast Charging
When it comes to charging your EV, you have a few options, each with different speeds. Level 1 charging uses a standard 120-volt wall outlet. It’s the slowest method, sometimes taking over 20 hours for a full charge, making it best for plug-in hybrids or occasional use.
Level 2 charging is the ideal solution for home use. It operates on a 240-volt circuit and can fully charge your car in just four to eight hours. A Level 2 charger typically adds 20 to 25 miles of driving range per hour, making overnight charging incredibly convenient. DC Fast Charging is what you’ll find at public charging stations along highways. It’s the quickest option by far but isn’t available for home installation.
Why a Level 2 Charger Is Perfect for Your Home
Installing a Level 2 charger at home completely changes the EV ownership experience. The biggest advantage is convenience. You can plug in your car when you get home from work and have a full battery waiting for you in the morning, completely eliminating range anxiety for your daily commute. With a 240V charger, you can reliably charge your EV overnight in about eight hours.
Beyond convenience, home charging is also much more affordable. Charging at home often costs about one-third of what public fast charging costs per mile, leading to significant savings over time. It’s a smart investment that not only makes your life easier but also adds modern functionality and value to your property.
Key Electrical Requirements for Your Level 2 Charger
Getting a Level 2 charger installed is an exciting step, but it’s more involved than just plugging in a new appliance. Because these chargers are powerful, they have specific electrical needs to ensure they work safely and efficiently. Think of it as preparing your home’s electrical system for a major upgrade. Before you can enjoy faster charging, you need to make sure your wiring, circuit breaker, and electrical panel are all up to the task. Let’s walk through exactly what that means for your home.
The 240-Volt Circuit You’ll Need
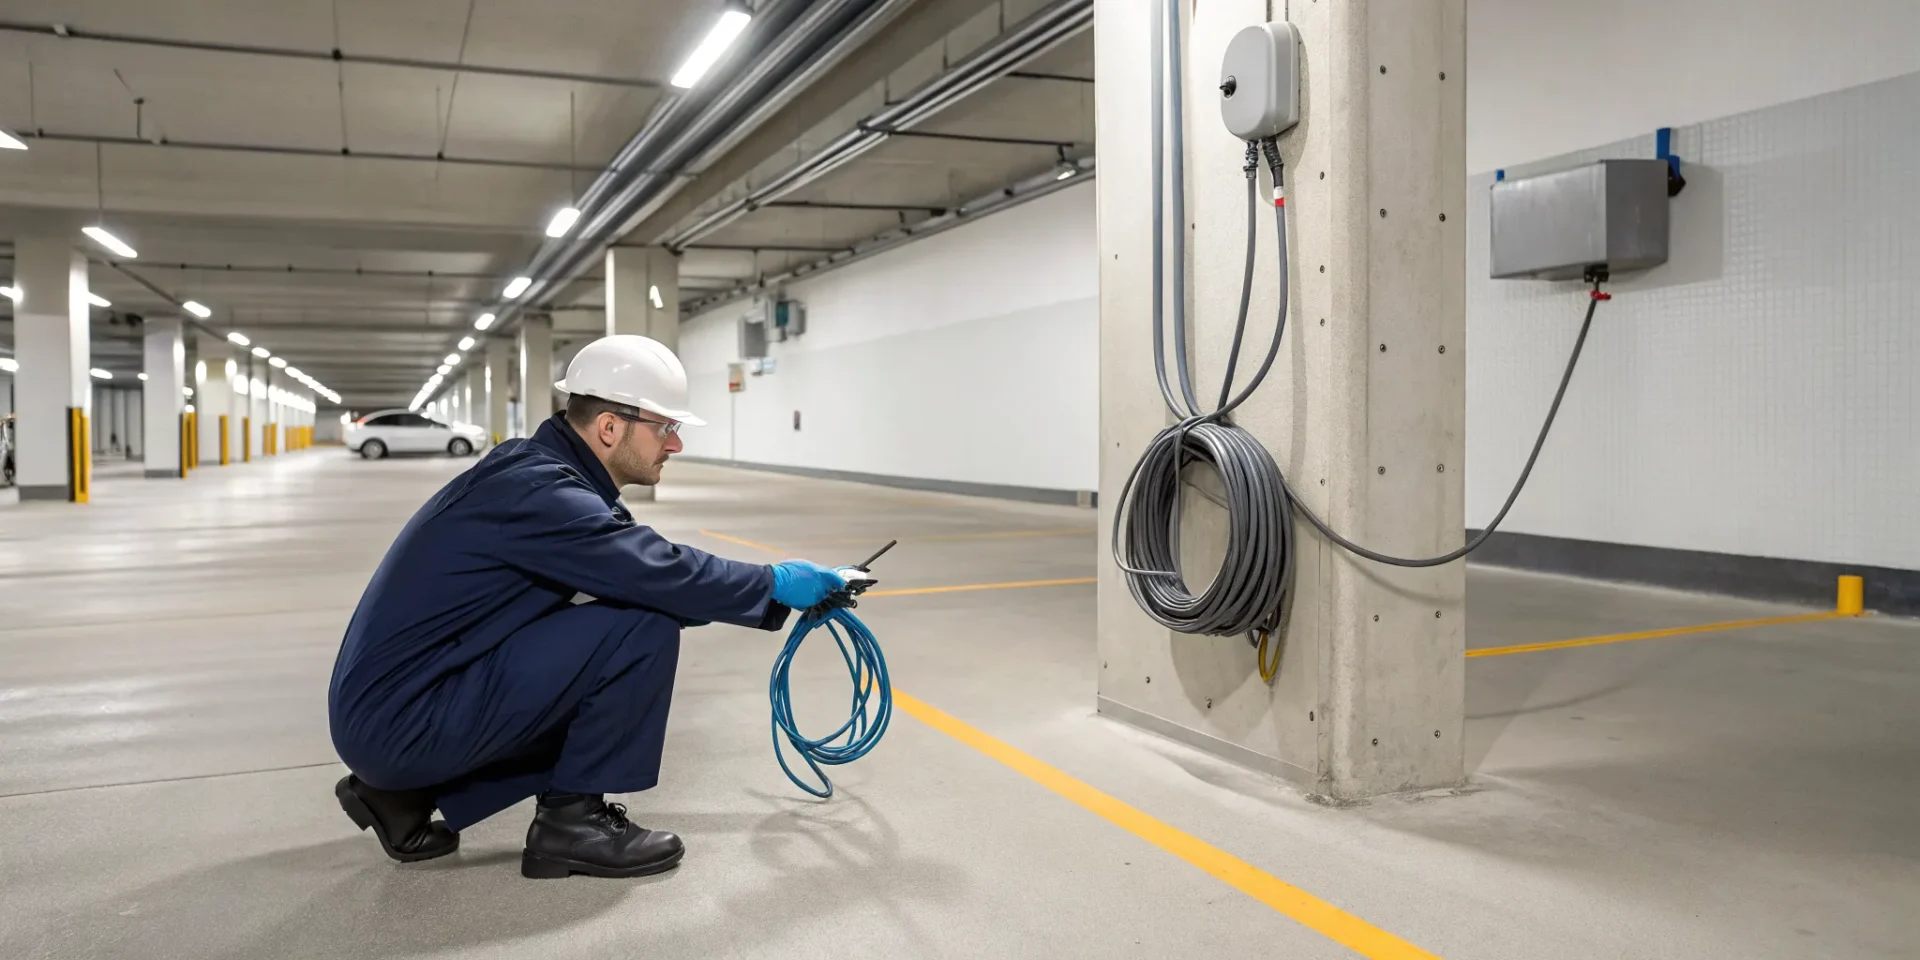
The biggest difference between a Level 1 and a Level 2 charger is the power source. While a Level 1 charger uses a standard 120-volt wall outlet, a Level 2 charger requires a dedicated 240-volt circuit. This is the same type of circuit that powers your home’s largest appliances, like an electric stove or a clothes dryer. This higher voltage is what allows your EV to charge significantly faster. A licensed electrician will need to install this circuit, running the necessary wiring from your electrical panel to your desired charger location. This isn’t a simple extension cord situation; it’s a permanent and essential part of a safe installation.
Amperage and Circuit Breaker Specs
Amperage, or “amps,” determines how quickly your charger can deliver power to your car. Level 2 chargers come in a range of amperage ratings, typically from 15 to 80 amps. The higher the amperage, the faster the charge. To support this, you’ll need a circuit breaker that can handle the load safely. A key rule is that the breaker must be rated for 20% more than the charger’s output. For example, if you choose a 40-amp charger, you’ll need a 50-amp breaker. This prevents the breaker from tripping during normal use and protects your system from overheating.
Checking Your Electrical Panel’s Capacity
Your home’s main electrical panel is the hub that distributes power everywhere. It has a maximum capacity, usually 100 or 200 amps for most modern homes. A Level 2 charger is a significant new load, so your panel must have enough spare capacity to handle it without being overloaded. If you live in an older home, you might have a 60-amp panel, which will almost certainly require an upgrade. A qualified electrician can perform a load calculation to assess your current electrical use and determine if your panel can safely accommodate the new charger.
Following Safety Codes and the NEC
Safety is the top priority with any electrical work. The National Electrical Code (NEC) sets the standards for safe electrical installations, and it requires every EV charger to be on its own dedicated circuit. This means no other outlets or appliances can share the circuit, ensuring the charger always has the power it needs without creating a fire hazard. Because of the high voltage and specific code requirements, this is not a DIY project. You should always hire a licensed electrician to install your charger, ensuring it meets all local and national safety standards.
Where to Install Your Level 2 Charger
Choosing the right spot for your Level 2 charger is one of the most important steps in the installation process. The location affects not only your daily convenience but also the overall cost and safety of the setup. Thinking through a few key factors, like where you park and the location of your electrical panel, will help you find the perfect place for your new charger. A little planning now ensures you’ll have a seamless charging experience for years to come.
Easy Access: Parking and Proximity
The best location for your charger is close to where you consistently park your EV. For most people, this means inside the garage or on a nearby exterior wall if you use a driveway or carport. Think about the location of your car’s charging port. You want the charging cable to reach it easily without being stretched taut or creating a tripping hazard on the floor. A well-placed charger makes plugging in a quick, effortless part of your daily routine instead of a frustrating chore. Planning for this simple convenience will make a huge difference in your day-to-day use.
Indoor vs. Outdoor Installation
Installing your charger inside a garage is often the simplest option. It keeps the unit protected from the elements, which can extend its lifespan, and adds a layer of security. However, an outdoor installation is a great alternative if you don’t have a garage or prefer to park in the driveway. If you go this route, it’s essential to choose a charger with a NEMA 3R or NEMA 4 rating. These ratings mean the unit is weatherproof and built to safely withstand rain, snow, and fluctuating temperatures. A qualified electrician can help you select the right outdoor-rated equipment for your home.
Distance From Your Electrical Panel
The distance between your electrical panel and your new charger is a major factor in the total installation cost. The farther away the charger is, the more wiring and conduit will be needed to connect it. This increases both material and labor costs. Ideally, you’ll want to install the charger on a wall that is relatively close to your panel. During an initial consultation, a professional can map out the most direct and cost-effective wiring path. Understanding your home’s layout is a key part of our residential electrical work and helps keep your project on budget.
Cable Length and Safety
Charger cables typically come in lengths from 16 to 25 feet. While a longer cable offers more flexibility, it can also be cumbersome to manage. Choose a length that comfortably reaches your vehicle’s charging port from your chosen installation spot without leaving too much excess cable on the ground. Safety is also paramount. A Level 2 charger requires its own dedicated 240-volt circuit to operate safely and efficiently. This isn’t a standard outlet, and installing one correctly is a job for a licensed electrician who can ensure everything is up to code and properly grounded.
Do You Need a Professional Electrician to Install Your Charger?
When it comes to installing your new Level 2 charger, you might be wondering if you can tackle it yourself. While the DIY spirit is admirable for many home projects, this is one area where calling in a professional is the only safe option. Let’s walk through why bringing in an expert is so important for a successful and secure installation.
The Risks of a DIY Installation
It might seem like a way to save money, but a DIY EV charger installation is incredibly risky. You’re working with high-voltage electricity, where a small mistake can lead to serious injury. Beyond personal safety, an improper installation can be a major fire hazard, potentially damaging your home, your new charger, or your electric vehicle. Many manufacturers will also void the warranty on your equipment if it isn’t installed by a licensed professional. It’s simply not worth the gamble when your home and family’s safety are on the line. This is a job best left to those with the right training and tools.
What to Look for in an Electrician
When you’re ready to hire a professional, don’t just call any electrician. You need someone who is licensed, certified, and has specific experience installing EV chargers. An experienced electrician will do more than just connect the wires. They’ll perform a full assessment of your home’s electrical system to make sure it can safely handle the added load from the charger. This critical step prevents issues like overloaded circuits and ensures your installation is both safe and reliable for years to come. Look for a team with a proven track record in residential electrical projects to guarantee the job is done right.
Permits and Inspections: What to Expect
Proper installation involves more than just the physical work; it also means following local regulations. In almost all cases, you will need an electrical permit to install a Level 2 charger. The good news is that your electrical contractor typically handles the entire permitting process for you. After the installation is complete, a local inspector will likely need to review the work to confirm it meets all safety codes. This isn’t just red tape. It’s a final check that provides peace of mind, ensuring your charger is installed correctly and safely. A qualified electrician will know exactly what permits are required for your area.
Hiring the Right Electrical Contractor
Finding the right contractor is the final piece of the puzzle. Start by asking for a site assessment. A qualified electrician should visit your home to evaluate your electrical panel, discuss the best location for the charger, and identify any potential upgrades needed before work begins. This assessment allows them to provide an accurate and detailed quote. It’s a good practice to get two or three quotes from different licensed electricians to compare costs and approaches. When you’re ready to move forward, choose a contractor who communicates clearly and makes you feel confident in their ability to handle the job. You can reach out to our team to schedule an assessment and get a clear plan for your installation.
Common Installation Mistakes to Avoid
Installing a Level 2 charger is a fantastic upgrade for your home, but a few common missteps can turn an exciting project into a frustrating one. Getting ahead of these potential issues ensures your installation is safe, efficient, and ready for the road ahead. By working with a qualified electrician, you can easily sidestep these pitfalls and get your installation done right the first time.
Using the Wrong Electrical Circuit
One of the most critical errors is connecting your charger to the wrong type of circuit. A Level 2 charger isn’t like a standard appliance; it requires its own dedicated 240-volt circuit to function safely and effectively. Trying to wire it into an existing, lower-voltage circuit won’t provide the power your EV needs and can create a serious electrical hazard. A professional will ensure a special 240-volt electrical circuit is installed just for your charger.
Skipping Local Codes and Permits
It can be tempting to cut corners to save time or money, but skipping permits is a mistake you don’t want to make. Most areas have specific electrical codes for EV charger installations and require special permits and inspections to ensure the work is done safely. These regulations are in place to protect you and your home from potential fire hazards or faulty wiring. A licensed electrical contractor will handle all the necessary paperwork, making sure your installation is fully compliant.
Picking the Wrong Charger for Your Car
Bigger isn’t always better, especially when it comes to EV chargers. Every electric vehicle has a maximum speed at which it can accept an AC charge. If you buy a charger that delivers more power than your car can handle, you’re paying for performance you can’t use. Before you purchase, check your vehicle’s charging capacity. This simple step ensures you don’t buy a charger that’s faster than your car can manage, saving you money on the initial purchase.
Forgetting to Plan for the Future
Your current electric vehicle might be your only one right now, but what about five years from now? A common oversight is failing to plan for future needs. Will your family add a second EV? Might your next car have faster charging capabilities? When discussing your installation with an electrician, it’s wise to think about future needs. Installing wiring that can handle a higher amperage now can save you from a more expensive and disruptive upgrade down the line.
What Affects Level 2 Charger Installation Costs?
When you’re planning your budget for a home EV charger, it’s helpful to know that the final price tag is more than just the cost of the charger itself. Several key factors come into play, from the equipment you choose to the current state of your home’s electrical system. Understanding these variables will help you get a clear picture of the total investment and avoid any surprises along the way. Think of it as a complete project with a few moving parts: the hardware, the professional labor, any necessary home upgrades, and coordination with your local utility. Breaking it down this way makes the process much more manageable and ensures you’re prepared for every step.
Charger and Equipment Costs
First up is the charger itself. The cost for the unit can vary quite a bit depending on the brand, amperage, and features like Wi-Fi connectivity or smart scheduling. According to the U.S. EPA, you can expect the charger equipment to cost anywhere from $400 to $1,000. For Level 2 chargers specifically, the hardware typically falls in the $300 to $900 range. More advanced models with app integration will be at the higher end, while simpler, plug-in style chargers will be more budget-friendly. It’s worth considering which features you’ll actually use to find the right balance between functionality and cost.
Labor and Professional Installation Fees
Unless you’re a licensed electrician, this is a job you’ll want to leave to the pros. The cost for a professional installation can range from $300 to over $2,000. This wide range is because every home is different. The final price depends on the complexity of the installation, how far your garage or parking spot is from your electrical panel, and the hourly rates for electricians in your area. A straightforward installation where the panel is in the garage will be on the lower end. A more complex job that requires running conduit through walls or across your property will cost more. This is where getting a detailed quote from a qualified electrical contractor is essential.
Potential Electrical Upgrades and Permits
This is where some of the less obvious costs can appear. A Level 2 charger requires a dedicated 240-volt circuit, which your home may not already have available. If your electrical panel is full or doesn’t have enough capacity to handle the extra load, you might need to upgrade your home’s electrical panel. Additionally, most areas require a permit for this type of electrical work. While it’s an extra step, getting the proper permits and inspections is crucial for safety, meeting local codes, and even for your home’s insurance and future resale value. A professional electrician will handle the permitting process for you.
Your Utility Provider’s Requirements
Before you begin any work, it’s a great idea to check in with your local utility provider. Some providers have specific requirements or programs for EV charger installations. For example, some utilities recommend a preliminary check to identify any potential issues with the electrical supply to your home before you even start the installation. Giving them a call early in the process can save you time and potential headaches. They can confirm if your current electrical connection can support the new load and let you know about any special rates or rebates for EV owners.
Your Pre-Installation Checklist
A little preparation before your EV charger installation can make the entire process feel seamless. By thinking through a few key details ahead of time, you can avoid surprises, ensure your home is ready, and find the right professional for the job. This checklist walks you through the essential steps to take before an electrician arrives, turning a potentially complex project into a straightforward one. We’ll cover everything from gathering quotes and understanding safety certifications to coordinating with your local utility provider.
Working through these items will help you feel confident and prepared for a smooth, safe, and efficient installation. It also ensures you and your electrical contractor are on the same page from the very beginning, setting your project up for success. Think of it as your project roadmap. Following these steps helps guarantee that your new charger not only works perfectly with your vehicle but also integrates safely with your home’s electrical system. It’s about protecting your investment in both your car and your home. Taking the time to plan now prevents costly fixes and headaches later, ensuring you can enjoy the convenience of at-home charging without any worries. Let’s get you ready for installation day.
Get Quotes From Licensed Electricians
While it might be tempting to tackle the installation yourself, this is a job best left to the pros. Hiring a licensed electrician is the most important step you can take to ensure a safe and correct installation. A qualified professional will assess your home’s electrical system to confirm it can handle the new charger without overloading. They are also up-to-date on all local codes and permit requirements, which protects you from potential issues down the road. We recommend getting at least two or three quotes from reputable, licensed electrical contractors to compare pricing and find the best fit for your project. This helps you understand the scope of the work and make an informed decision.
Understand Grounding and Safety Certifications
Not all EV chargers are created equal. When choosing your equipment, always look for a charger that is safety-certified. Marks from organizations like UL, ETL, or ENERGY STAR mean the product has been rigorously tested and meets high safety and performance standards. This is a simple way to verify you’re buying a reliable product. Your electrician will handle the technical aspects of proper grounding, which is a critical safety feature that protects you and your equipment from electrical faults. Also, consider the charger’s cable length. You’ll want to make sure it can comfortably reach your car’s charging port without being stretched or creating a tripping hazard in your garage or driveway.
Plan for GFCI Protection
You’ve probably seen GFCI outlets in your kitchen or bathroom; they’re the ones with the “test” and “reset” buttons. A Ground Fault Circuit Interrupter is a fast-acting device designed to shut off power in an instant if it detects an imbalance, protecting you from electric shock. EV chargers have specific GFCI requirements that are different from a standard household outlet. While some people consider using an existing 240-volt outlet, like one for a clothes dryer, these often lack the correct type of GFCI protection for an EV charger. A professional electrician will know exactly what’s needed to keep your setup safe and code-compliant, whether that means a hardwired charger or a dedicated, properly protected outlet.
Coordinate With Your Utility Company
Before you finalize your installation plans, it’s a good idea to give your local utility company a call. This step is often overlooked but can be incredibly helpful. Your utility provider can confirm if your home has enough power capacity for a Level 2 charger and let you know about any special rates or programs for EV owners. Some companies offer time-of-use plans that make charging overnight much cheaper. We recommend reaching out at least a couple of weeks before your planned installation date. Your electrician can also provide guidance on what to ask, ensuring you have all the necessary information to make smart decisions about your energy use and potentially save money on your monthly bills.
Frequently Asked Questions
How much faster is a Level 2 charger than the one my car came with? A Level 2 charger is a significant upgrade in speed. The standard Level 1 charger that comes with most EVs plugs into a regular wall outlet and might take over 20 hours for a full charge. In contrast, a Level 2 charger uses a 240-volt circuit and can fully charge your vehicle in about four to eight hours, making it perfect for overnight use.
Can I just use the 240-volt outlet my dryer uses? While it might seem convenient, you should not use your dryer outlet for your EV charger. The National Electrical Code requires that every EV charger be on its own dedicated circuit. This rule is in place for safety, as sharing a circuit with another large appliance can cause overloads and create a fire risk. A professional electrician will install a new, dedicated circuit specifically for your charger.
What happens if my home’s electrical panel is too old or doesn’t have space? This is a common situation, especially in older homes. If your electrical panel lacks the capacity or physical space for a new 240-volt circuit, it will likely need to be upgraded. A licensed electrician can assess your panel during a site visit and determine the best course of action, ensuring your home’s electrical system can safely handle the new load.
How long does the installation process usually take? A straightforward installation, where the electrical panel is in the garage and close to the desired charger location, can often be completed in just a few hours. However, more complex jobs that require running wiring through walls or upgrading the electrical panel will take longer. Your electrician can give you a more precise timeline after assessing your home.
Will installing a Level 2 charger increase my home’s value? Yes, installing a Level 2 charger is often seen as a valuable home improvement. As electric vehicles become more common, having a home that is already equipped for fast, convenient charging is a major selling point. It’s a modern amenity that adds functionality and appeal to your property for potential future buyers.